Every time I go to a farmers' market, I try to stick to a few items I know I'll use that week. But every time, I also find one item that I hadn't planned on. Sometimes they're the delicious strawberries I didn't think I needed (and then ended up on the Strawberry & Goat Cheese Pizza not too long after). Other times it's an item I have absolutely never used, but they look too beautiful to pass up.
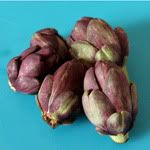
That's the story with these artichokes.
I try to hit one of the West LA Farmers' Market on Sunday mornings, but I'm usually too lazy to get out of bed in time to nab the "good stuff." Last Sunday I broke with tradition and forced myself up and out to get to a market relatively early (only 2 hours after it opened!). And that's when I spied the purple chokes. Or chokies, since they're just wee little babies.
I walked past them, smiling. I wasn't really interested, even though I've been on a purple veggie kick lately (purple potatoes and purple eggplant...yesterday I even found purple bell peppers!). But a walk back through the same aisle proved too tempting. I gave in and brought them home.
Then I scoured the internet to find what to do with them. It turns out that Greg Henry has a wonderful recipe for fried chokies, and it appears about 17 thousand times on the front page of Google. So I took that as a sign that I should make them that way.
Greg recommends trimming the chokes and then pressing them down so the flowers open up and all the fried goodness gets down to the hearts. They'll look a little like this:
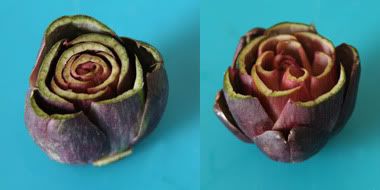
Trimmed, then pressed and opened, like a flower.
He also recommends using a combo of olive and peanut oil. Since I didn't have peanut, but pomace oil has an even higher smoke point, I used it. Plus, I had it on hand.
Using a deep fry thermometer is key. I winged it when I made it for my parents, and they didn't have the same crunch factor. For all I know, I was frying them at 300 degrees instead of 360 degrees the entire time. Don't do that to yourself. Get one of these.

From Sippity Sup:
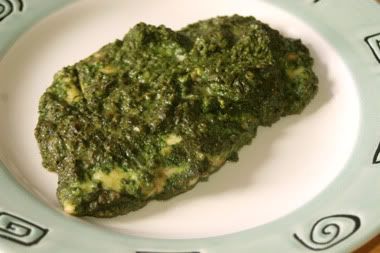
Fried Purple ChokiesMine appear a bit overdone in comparison to Greg's pictures. But they were still tender on the inside, and crispy like potato chips on the outside. I devoured these 4 in no time.
Serves 4
12 baby artichokes
enough olive (or pomace) oil and/or peanut oil to deep fry (depends on your fryer)
salt and pepper
lemon wedges (optional)
1. Trim away a few of the tough outer leaves of each artichoke, Then chop off about 1/3 of the top of the artichoke and trimmed the stem down so that the artichoke will sit flat. Use your fingers to pry and prod the leaves open some. Then invert the artichoke and gently flattened it a bit more using the palm of your hand. Gently is the key word here. They break easy. Drop each artichoke in acidulated water until ready to use.
2. The first fry is to blanch only so heat your oil to 300 degree F oil. Dry the artichokes off well before continuing. Drop a few at time into the oil for about 2 minutes. Remove them to a paper towel lined plate to drain (upside down). Work in batches so that you do not crowd the fryer.
3. When you are ready to serve the artichokes raise the temperature of the oil to 360 degrees F. They will sizzle and get brown and crunchy quickly; about 2 minutes total frying time should do it. Again, work in batches, and turn them over in the oil a few times while cooking.
4. Drain them well and give them a good sprinkle of excellent salt and a bit of pepper. A little spritz of lemon juice is good too. But you MUST eat them hot to fully enjoy their textures!