Girl + Fire = Food
EMPTY SPACE

Pages

EMPTY SPACE

Monday, March 21, 2011

Truffled Egg Salad

This Cheese Fast thing is getting ridiculous. I feel like the universe is mocking me. The other day I drove past a NEW grilled cheese truck right next to the office.

Not fair!!

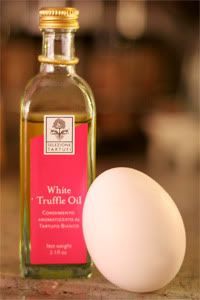
So I've turned to my other food love: truffles. Not those chocolate things, since I don't have much a sweet tooth, but the supremely expensive subterranean delights from distant lands. The easiest way to experience them without going broke is either truffle salt or truffle oil. And thanks to dear food blogger friend Erika Kerekes, from whom I borrow lots of recipes, today I had BOTH!

So decadent.

Surfas has teeny tiny bottles of both white and black truffle oil for only $12. For 2 ounces. Yup, 2 teeny tiny ounces. But compared to paying $300 per pound of the actual mushrooms, it's a steal. And the Spice Station has salt for $10 an ounce (only 1/3 the price of saffron!). I've had both the oils and salt in the pantry forever, so this was just waiting for me to hard boil some eggs.

(Thankfully my random allergy to eggs has disappeared. Yay!)

I used white truffle oil because that's the type of salt I had and figured they would pair well. The black truffle oil is a bit more earthy, and I like it in green salads. This would taste just as deliciously with the black truffle oil, I'm sure. They're both excellent.

And since I was cooking for just one person, I cut the recipe significantly. I was out of my typical mayo substitute (Greek yogurt), so I went without. It was still creamy and delicious. I also mashed this together in my mini chopper because I love that thing, though you could do as Erika suggests and simply mash them with a potato masher. But I like to save my elbow grease for tennis and/or sipping scotch.

Not necessarily in that order.


print recipe

Truffled Egg Salad
Adapted from In Erika's Kitchen. This is quick, delicious, and just a tad decadent. Use a mini chopper to whirl it together quickly and with minimal elbow grease.
Ingredients
4 eggs, hard boiled
1 tablespoon white truffle oil
1/8 teaspoon white truffle salt

1-2 tablespoons sour cream
Instructions
1. Peel the eggs and crumble them into the bowl of the mini chopper.

2. Add the sour cream, salt, oil, and blend away.

3. If the consistency isn't creamy enough, add more sour cream a little at a time.

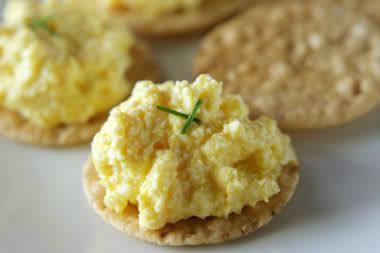
Spread on crackers, in tortillas, or simply eat straight out of the bowl. Don't try to control yourself, you will lose that battle.

Yield: approx 1.5 cups

Wednesday, March 9, 2011

Good-bye Cheese

Cheese. Delicious, yummy cheese. There are few things I love more than this wonderful offering from the goats, cows, and sheep of the world.

Well, there are truffles, mmm truffles. Yes, but those are prohibitively expensive.

Oh, and scotch. Yes, scotch. Especially with bacon. I do love a fine glass single-malt. Though it, too, gets pricey.

Ah, but cheese. It's rich in flavor, but not necessarily in price. Oh, I have enjoyed some sinfully delicious and radically expensive ash-covered goat cheese, but most of the time a few bucks' worth satisfies the palate.

So why am I giving up cheese? Why, if I swore I would never become a vegan because of my love of this delicious animal by-product, am I walking away?

Here's a little story: when I was four years old, my parents found me lying in the middle of our (thankfully) quiet residental street. After they finished freaking out and scooping me out of harm's way, they asked WHY ON EARTH WOULD I DO SOMETHING LIKE THAT???? My answer: just to see what would happen.

(That story started off the essay that got me into college.)

So yeah, I have no other reason to give up my entire raison d'être than my own curiosity as to whether I even can. It's a battle of will. Discipline.

And also, given the amount of cheese I eat, I might very well be an addict. If cheese were heroin, this is what you might call "the intervention" stage. Therefore I'm taking a bit of a break, and it seemed like today, being the day a bunch of other people around the world are sacrificing something in their lives, was a good day.

So good-bye cheese. I'll see you again in 40 days.

Unless your attraction proves too tempting. But I think I can handle this.

*fingers crossed*


And so begins the great Cheese Fast of 2011.

Tuesday, March 1, 2011

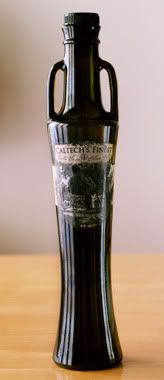
CalTech Olive Oil

Last fall, my nephew, mom, and I went a-pickin' at the Caltech Olive Harvest. It was fun. There was escargot.

About a month later, we got the word that the olive oil was in stock. $13 for an 8-ounce bottle! But I'd done the labor, and was curious enough so I bought two bottles (gifted one to my parents, since mom had done the laboring too).

We opened the bottle immediately upon arriving home and wow, was I surprised. You could say I'm an olive oil noviceI'd never had something so fresh and olive-y! It tasted exactly like...green olives. Yes I could almost literally taste the greeness. It was a bit much.

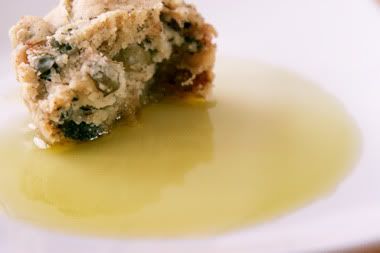
Because it's only 8 ounces and has such a strong flavor, I've been hesitant to use it to cook with. But I decided to fool with the Foodista Olive Muffins this weekend, and ran out of the "regular" olive oil in the pantry, so I had to use some of my super green oil. The muffins were a bit of a disaster. They were too dry, like scones. But when dipped in the olive oil, mmm. Goodness.


Once I perfect the muffins, I'll post the recipe. Till then, I have to figure out other ways to use this oil. The Fire is open to suggestions!

Thursday, February 24, 2011

More Romanesco Love

I'm still eating my Romanesque veggies (maybe I should've called this Green Food Week). Like its cauliflower cousin (brother, mother, uncle?) it really is better roasted. Though steamed isn't so bad either. It turns a bright green when you steam it. Pretty!

And perfect for Martha Stewart's puree recipe. Steamy veggies, heavy cream, and cheese! We know how much I love cheese. Like bacon, it makes everything better.

Add sautéed leeks, some roasted cauliflower (the white kind), a shallot or two, then serve it with some cheese, and damn.

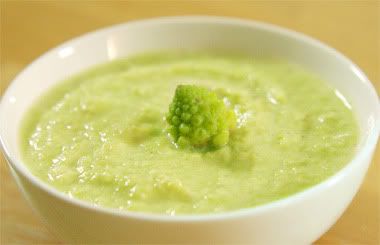
The curious vegetable plays nicely in a puree. A bright green mixture of veggies and cream and stuff. Come to think of it, I should've added bacon. Next time...


Broccoli Romanesco Puree
Yields 2 servings

4 tablespoons extra-virgin olive oil
2 cups Romanesco broccoli florets
2 cups cauliflower florets
2 garlic cloves, thinly sliced
1 leek, chopped into half-inch rounds
1 shallot, chopped
1/4 cup water
1 teaspoon salt
1/4 cup whole milk
1/4 cup heavy cream
Salt and pepper, to taste

1. Preheat oven to 400 degrees. Chop the cauliflower into 1-inch florets, toss with 1 tablespoon of olive oil, sprinkle with salt and paper. Spread the cauliflower over a foil-covered baking pan and roast for about 20 minutes. Cauliflower should begin to look burnt (that's when you know it's REALLY good).

2. Chop the broccoli into 1-inch pieces and steam over boiling water until brightly colored (about 8 minutes). Or for a deeper flavor, roast it with the cauliflower.

3. Heat remaining oil in a large skillet over medium heat. Add leeks and shallots, cook until they begin to turn golden brown (about 5 minutes). Add the garlic in the last minute.

4. Add water, the teaspoon of salt, sauteed vegetables and half the roasted/steamed vegetables to blender (reserve half the broccoli and cauliflower for garnish). Blend until smooth. Do this in batches if necessary.

5. Bring milk and cream to a gentle simmer in a saucepan. Add milk-cream mixture to blender with puree, and pulse to combine. Stir mixture into first batch of puree.

6. Season with more salt and pepper if necessary. Garnish with reserved vegetables.
Martha's recipe calls for Parmigiano-Reggiano, but I don't like it. I simply added a few cubes of Italian truffle cheese and called it heaven. But the more I think about it, yeah, that bacon would have been a nice addition.

Wednesday, February 23, 2011

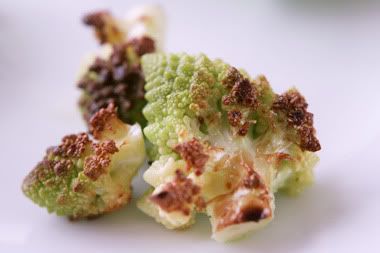
Wordless Wednesday: Roasted Roman Cauliflower

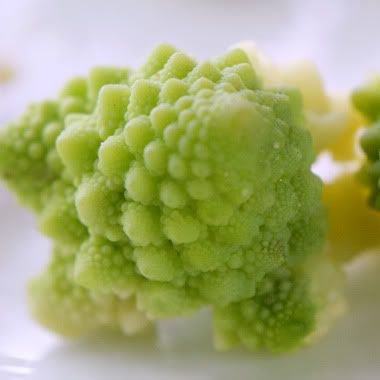
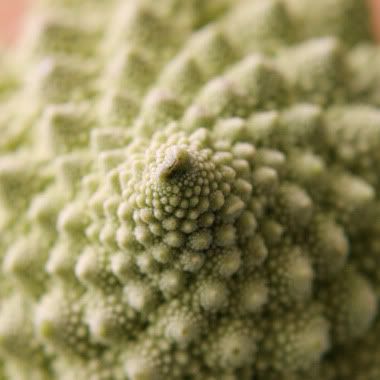
The Lovely Romanesco Veggie

Is it a broccoli or a cauliflower? Both Serious Eats and Wikipedia call it broccoli, but the woman at the Mar Vista Farmers' Market said it was cauliflower. And even that Wikipedia article refers to it as Roman cauliflower. So the absurdly beautiful vegetable has both an identity crisis and an intriguing fractal pattern of growth. It's even been called alien, poor thing.

Last night I called it dinner.

I'd been looking for one of these since I read somewhere that it was milder than cauliflower (which I hate, unless roasted). So it was with much excitement that I took this baby home to experiment.

First I had to try it raw. What a mistake. It tastes exactly like raw cauliflower: yucky! I don't know how people choke that down. If you're one of those raw cauliflower-loving types, please help me understand the appeal.

With that failed attempt, I opted for the tried-and-true method of oven roasting. A little olive oil, some Adobo seasoning, and into a 400 degree oven it went for 20 minutes. It came out brown and delicious.

I also threw some in a pan with hot olive oil and fried its little fractal patterns until they were brown and crispy. What doesn't taste good fried? (I also steamed some of it, but that's for another post.)

I had a variety of dipping options for my browned goodness, but I opted to indulge in cheesy dip someone had left in my fridge after a party.

And that was dinner. Veggies and cheese. It's mmm, good!

Thursday, February 17, 2011

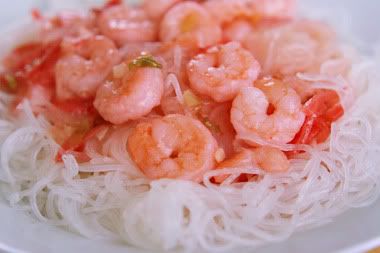
Gingered Shrimp & Noodles

Red Food Week continues on the Fire with shrimp!

Yes, shrimp is orange. But when I made the dish, the sauce turned pink because the pickled ginger was a bright red color. Did I mention it was also delicious?

The recipe calls for uncooked deveined shrimp. I'm busy Girl, I don't have time to shell and devein the shrimp, so I bought some frozen cooked shrimp and only heated them through to avoid that awful rubbery texture. It worked.

I like cellophane noodles. They've made an appearance on the Fire before. They are super easy to cook. Throw a bunch (they're packaged like small individual serving-size nests) into boiling water for 3 minutes then drain. You could also simply serve this over rice too. But the noodles cook up faster!

As it is, this dish cooks up super quickly, especially if you use the pre-cooked frozen shrimp. Great for those nights when I'm in the office super late.


Original recipe on Food.com.
Gingered Shrimp & Noodles
Yields 2 servings

3 ounces cellophane noodles
4 teaspoons oriental sesame oil
2 tablespoons rice vinegar
2 tablespoons chopped fresh cilantro
2 tablespoons fresh ginger, seasoned, sliced (also known as pickled ginger or sushi ginger)
1 tablespoon minced pickled jalapeno pepper
2 teaspoons honey
12 ounces cooked, deveined, peeled medium shrimp, tails left intact
4 green onions, sliced
2 garlic cloves, minced
2 teaspoons cornstarch
1/2 cup water

1. Cook noodles according to package (usually boil water and then place noodles in water for 3-5 minutes). Drain and transfer to bowl. Add 2 teaspoons sesame oil to noodles and toss.

2. Mix vinegar, cilantro, ginger, jalapenos and honey in small bowl.

3. Heat remaining 2 teaspoons sesame oil in heavy large skillet over medium-high heat.

4. Add green onions and garlic; saute til aromatic, about 2-3 minutes.

5. Add vinegar mixture and shrimp to skillet; stir until shrimp are just cooked through, approximately 1-2 minutes. Any longer and the shrimp will turn rubbery. (If not using frozen shrimp, cook a bit longer, about 3 minutes.)

6. Dissolve cornstarch in 1/2 cup water.

7. Add mixture to skillet; stir until liquid thinkens, approximately 2 minutes.

8. Mound noodles on platter. Top with gingered shrimp and serve immediately.

Tuesday, February 15, 2011

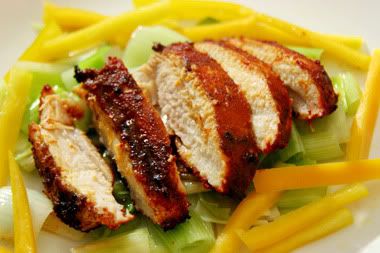
Sweet Smoked Paprika Chicken

Picture courtesy of Erika Kerekes,
LA Cooking Examiner
To continue on our theme of Red Food Week, I finally took a picture of Erika Kerekes' Broiled Boneless Chicken Thighs with Garlic Salt and Smoked Paprika before eating it.

I've made this dish only about a billion times. The reason is that there are all of 3 steps, so it's foolproof and perfect for a) lazy nights, b) late nights, or c) "I ain't got time for this" nights. And also days.

Seriously, 3 steps:
1. Coat chicken with paprika and garlic salt.
2. Broil for 7 minutes on each side.
3. Eat.

See? Easy.

Okay, so they come out more orange than red. But paprika is red, so there.

Erika recommends using smoked paprika, which is "available at Surfas and, now, at Costco, much to the delight of Los Angeles chefs everywhere." Surfas, which is a place I do love, can be pricey and I never have the patience for Costco, but I did have regular boring paprika and a sweet smoked paprika thanks to an overindulgent shopping trip at the lovely Silverlake outpost Spice Station (they also sell truffle salt for $10 per ounce, which is COMPLETELY worth it [and the indulgent part of the shopping trip]!).

Sweet smoked paprika is wonderful on the chicken. The thighs remain juicy even after 14 minutes in broil mode. And they come out sweet, and smokey, and plain ol' delicious.

Since most of my a) lazy nights, b) late nights, or c) "I ain't got time for this" nights (and days) usually also mean dinner for one, this recipe scales down nicely too. Take one chicken thigh, coat it with salt and paprika, broil, and done. Make 2 and you have lunch the next day.

Erika also recommends using more salt than you think you need. If you're on a reduced-salt diet, you can go easy on it, but she does make the point that you'll still be ingesting less sodium than a typical restaurant dish. Tonight I used a 3:1 paprika to salt ratio and it was fine.


The modified recipe:

Sweet Smoked Paprika Chicken
yields 1 serving

1 boneless skinless chicken thigh
2 tablespoons garlic salt
1 tablespoon each regular paprika and sweet smoked paprika

1. Preheat the broiler to high and place an oven rack 4 inches below the flame. (If you put the rack right under the flame, the chicken will burn before it cooks through.)

2. Line a baking sheet with foil and lay the chicken thighs out flat. Sprinkle each side generously with the garlic salt and paprika. (The measurements above are merely guidelines, use more as needed, and don't skimp on the salt!)

3. Broil the chicken about 7 minutes on each side, until the thighs are cooked through and have developed a nice crust (or as I like to put it, a yummy black char). Serve with some veggies or rice and eat immediately.

Thanks to Erika for providing us with a easy meal!

Monday, February 14, 2011

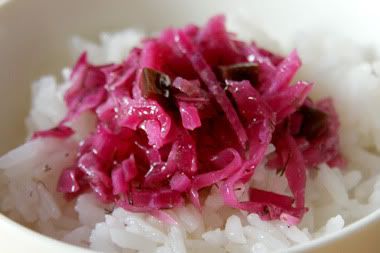
Aged Red Slaw

Hearts In honor of one of my favorite days of the year, Valentine's Day, this week is all about red food. Well, red and pink and purple. Because red is also my favorite color. And what better way to fall in love than over food?

Up first, some cole slaw. I'm not sure why it's called Three Week Cole Slaw, since it's ready in three days, but maybe it's just supposed to be one of the great mysteries of life. Oh, and remember when I hated cabbage? Not so much anymore! And the red kind is extra good for you.

The original recipe called for a white cabbage and white onion., but the red ones are so much prettier. Waiting the three days for this to age to sweet perfection was not easy. It smelled so good. Honey and vinegar, sweet and sour, yummmmm.

I took to eating this for breakfast mixed with quinoa. But it's also great in tacos, or just by itself, by the spoonful.

Other than substituting the colored versions of the veggies, I used celery salt instead of the seed/salt combo and added some dried dill weed. Delicious.


3 Week Cole Slaw
makes 12 servings

1 head red cabbage, chopped
1 jalapeño pepper, deseeded and chopped
1 red onion, chopped
1/2 cup oil (I used sunflower)
1/3 cup honey
1 cup white vinegar
2 tablespoons sugar
1 tablespoon celery salt
1 tablespoon dried dill weed

1. In a bowl, combine cabbage, pepper, onion, sugar and mix well.

2. Combine remaining ingredients in a saucepan. Bring to a hard boil, then pour over cabbage mixture and stir until thoroughly combined.

3. Store in refrigerator in airtight container. Let stand at least 3 days. The flavor improves the longer it sits. Will keep refrigerated for 1 month.
Mix it up today and it'll be ready to eat by the weekend!

Friday, February 11, 2011

Girl+Fire Turns 1 With A Top 5

Today is the day marked in all the Girl+Fire calendars as the day this site was born!

It's been a lovely year of experimentation in the kitchen, learning the ins and outs of food photography (an ongoing process), how to style food, and getting to hob nob with some of the coolest food bloggers in Los Angeles, the FBLA.

I'd like to thank all the readers and Facebook fans for your support, and hope to give you more and more good stuff!

To start, how about a retrospective? Here are the Top 5 Moments in G+F First Year:

5. Surviving the first Chopped-Inspired Dinner. Luckily the gathered friends and family made it easy. And we now have a running joke about Kevin Bacon and shrimp shakes (see the video here).

4. Learning the very simple art of canning! This was so much fun, and completely cured me of my fear canning. Which then led to my next favorite blogger moment...

3. Making sweet and spicy poblano jam. What happens when you add blueberries to jalapeños and poblano peppers? DELICIOSITY. It's a new word. I loved this jam so much, it's one of the few G+F recipes you'll see on both the blog and the calendar.

2. Meeting Chef Aarón Sanchez on my mom's birthday. He is such an incredibly nice guy, and we had the greatest time that evening.

1. The absolute highlight of the year, however, was being voted top pizza among the gathered food bloggers at Rosti Tuscan Kitchen last April. Getting to meet everyone who's blogs I'd been lurking on, and then having them pick my pizza was mind blowing.

There are, of course, plenty of other memorable moments. Finally getting to meet Oakley at the OC Foodie Fest AND learning her bacon scotch recipewhich was later featured on BaconScotch.com!!are just two of the many.

Thank you all again. It's been hectic, heartbreaking, and wonderful all rolled into one!

Sunday, February 6, 2011

Food Styling with Debbie and Cindie

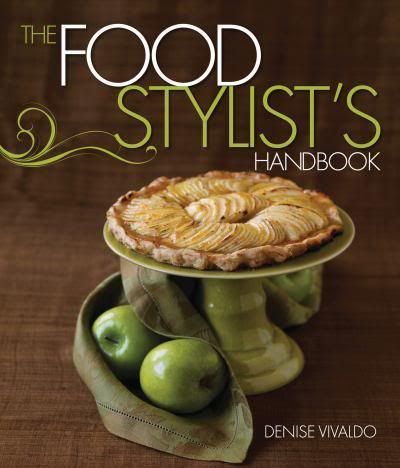
Last November, before the holidays and craziness of starting a new job, I was lucky enough to join a bunch of food people at Rosti (scene of the Pizza Pie Win of 2010) for an afternoon with the lovely ladies of Food Fanatics, Denise Vivaldo and Cindie Flannigan.

What. A. Great. Time.

Denise and Cindie are both experts in their field, but on top of that, they are genuinely funny, down-to-earth women. Their enthusiasm for food styling is infectious. And even though Denise stressed the days are VERY long for a stylist, they clearly really do love what they do.

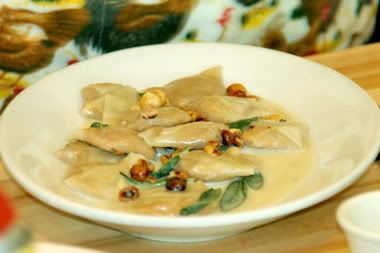
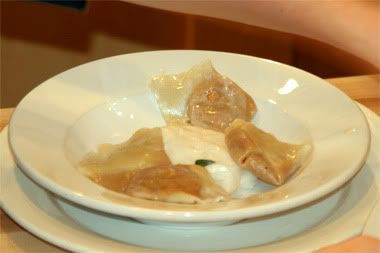
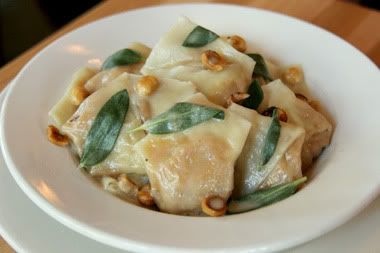
Pointing out pictures in her new book The Food Stylist's Handbook, Denise gave away all the secrets about how each shot was crafted. Pancakes were sprayed with sealant so the butter and syrup don't seep through. A blowtorch was used to crisp chicken skin to just the right shade of brown. As she talked, Cindie was busy building camera-ready plates from some of Rosti's menu items. A plate of ravioli gained height from the assistance of wet paper towels propped under each piece of pasta:

A standard plate of ravioli
Building the shot

The beautiful final product
We learned about layering the dish, making food look delectable, using herbs judiciously to add color. I think of it like us woman use accessories: to "dress up" the plate.

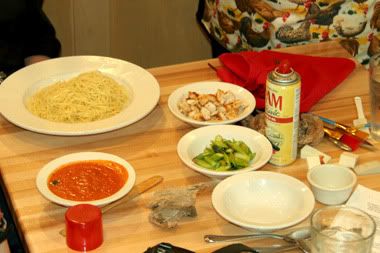
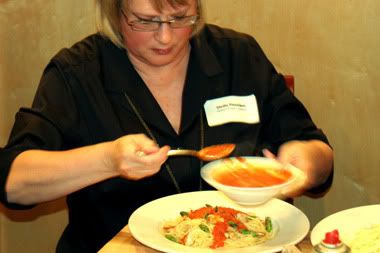
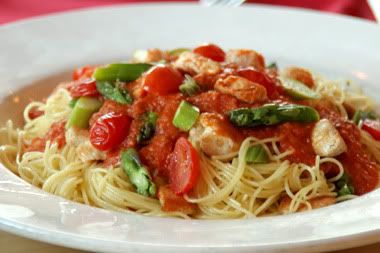
Here Cindie built a plate of spaghetti, a notoriously difficult food to style because of the chaotic look inherent to a pile of noodles. Denise emphasized that it's important that the plate not look too "busy".

The ingredients and tools
Cindie dressing the plate with sauce


The delicious looking dish

It was such a fun afternoon. I've since had the opportunity to read The Food Stylist's Handbook and it is a damn good book. In it is everything you ever wanted to know about the industry, from how to pack your kit (which no food stylist would ever leave home without), an honest, no-holds-barred take on what is required to make it as a stylist, funny anecdotes taken from their years in the field, up to step-by-step instructions for styling everything from cake to turkey, soups to steak.

Pick your copy up at Amazon. And follow the ladies on their blog Food Fanatics Unwashed.