Girl + Fire = Food
EMPTY SPACE

Pages

EMPTY SPACE

Monday, August 30, 2010

Food Truck Madness at the OC Foodie Fest 2010

The LA food trucks are now as ubiquitous as the palm trees and fake-tanned celebrities. A quick check on Twitter will give you the details for any given lunch or happy hour (or just follow @FoodTruckLA for all the updates). Being the food lover that I am, I've been on a mission to try as many of them as possible.

Food trucks have even spawned their own food festivals. In the last month both Los Angeles and Long Beach have hosted their own, and this weekend it was Orange County's turn.

I'd had to miss the two local events, so when the chance came up to volunteer for OC Foodie Fest, I jumped at it. In the process I was able to hit two separate goals of trying at least one new truck and FINALLY meeting the crazily talented OakMonster of Hmm...Food...Good.

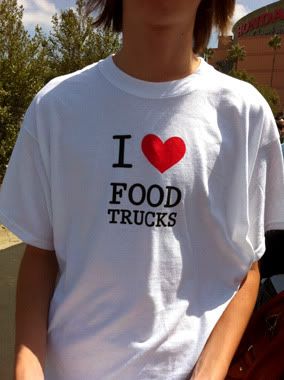
Oakley and I have "known" each other for the better part of a year. We have several real-life friends in common, follow each other on Twitter, and are connected on Facebook. We also worked less than half a mile apart and yet had NEVER been able to meet up. Until this past Saturday when we were paired together at check-in, where for four hours we helped scan very hungry and very enthusiastic food truck fans (like the boy above).

After our shift we got to roam around the event. It had been difficult to stand at check-in and watch the lines grow exponentially, knowing that we'd have slim to no chance of getting to experience some of the favorites. Most of the well-known trucks were there, including some of the crew from The Great Food Truck Race: Nom Nom Truck, Crepes Bonaparte and Nana Queen's Puddin' & Wings. The lines for these trucks in particular were beyond all limits of patience. Imagine Disneyland on the busiest day without a fast pass.
We decided to divide and conquer, setting our sights on two trucks we'd never tried and that had relatively short lines. Oakley took the OC-based Barcelona on the Go and I opted for LA's recently introduced Yatta Truck. How can you resist deep-fried cheeseburger rolls?

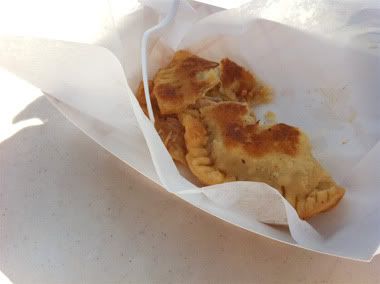
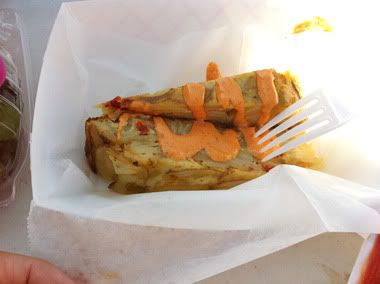
From the BOTG truck we ordered a fig and manchego salad (no picture) the chicken empanada (right) and a Spanish quesadilla (below).
The salad was absolutely forgettable. So much so that I forgot to take a picture of it. The empanada was not unlike ones my mom and I have made at home. Though not fried to a crisp like Argentinian turnovers, the filling was a bit greasy and under-seasoned. Disappointing. And since it was undoubtedly made of some sort of wheat based flour, I wasn't going to risk a reaction on it.

The quesadilla was interesting. Instead of just being filled with cheese, it was accompanied by a thick layer of potato and onion, and topped with a chipotle aioli. It wasn't bad. Different from the Mexican version I eat on a near-daily basis, but not bad.
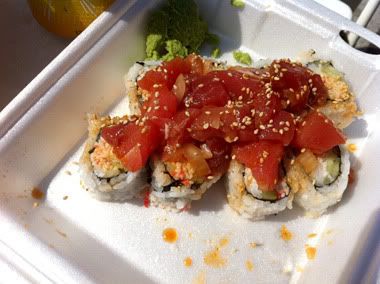
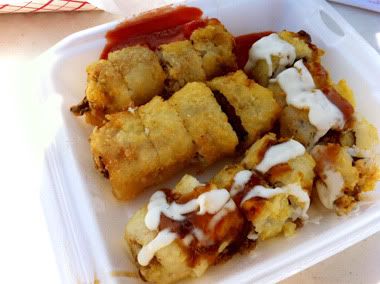
The Yatta Truck was a bit more exciting. There are five standard rolls to choose from, all inexpensive: $3.50 to $3.75 for four pieces, $6.50 to $7 for the super-sized eight pieces. You can also create your own roll by choosing up to four of twelve ingredients. I opted for the Poki ([right] tuna over a standard California roll—which I usually despise, but the tuna made it delicious), the Sweet Aloha (deep fried teriyaki beef and pineapple) and the aforementioned All-American cheeseburger roll (a deep fried cheeseburger).

The All-American (left) is on top next to the ketchup, Sweet Aloha is covered in yummy sauces. Oakley and I agreed that the fried cheeseburger needed to be paired with beer. But we were too worn out to walk to the beer garden and stand in a long line. In fact, after gorging ourselves on all those carbs, the food coma started to set in.

There were so many other trucks I wanted to try, especially those that never go beyond the Orange Curtain into LA like Louk's To Go. But the lines were either much too long or, as in LudoBites' case, they closed up early. Plus, after standing in the sun checking in over 3,000 people over the course of four hours, we were positively drained. 

(My pictures were taken with my iPhone, but Oakley busted out her Nikon DSLR and shot what I'm sure are much more beautiful pictures. Follow her blog for more details.)

The organizers did a fantastic job of creating buzz about the event. I was getting multiple updates daily via both Facebook and Twitter as new sponsors and trucks signed up. On the day of, all 8500 tickets had already been sold. Though there were plenty of first run mishaps, I applaud them for putting together a wonderful fundraising campaign, gathering great sponsors and entertainment, and best of all, highlighting gluten-free options! The map we handed out at the entrance had all this info listed. Brilliant.

Good job OC Foodie Fest!
Wednesday, August 18, 2010

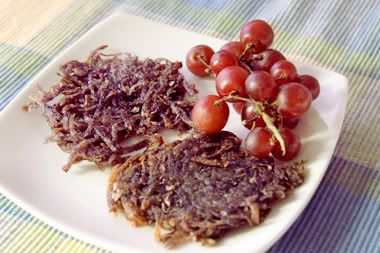
Purple Potato Hash

Anything your potato can do, my purple potato can do better. And by "better" I mean "more colorfully." Take hash browns for example (or hash purples, if you will).

Hash browns are the cornerstone of any good diner across this country. They're perfectly crispy on the outside and wonderfully tender on the inside. How does the line cook produce such alchemy? Magic, obviously. Also, dried potatoes.

Elise Bauer breaks the process down (with a funny story about her parents arguing about hash browns) and pictures over at Simply Recipes. The trick to perfectly cooked homemade hash browns: a potato ricer! I've always used mine to wring the water out of defrosted spinach, but this is even better.

Working with purple potatoes can be a bit messy. They have purple juice. And if you're not careful when pressing it out of the little grated suckers, it will get everywhere and stain everything. Wear a dark purple shirt when making these.

Elise's recipe calls for one large frisbee-disc size hash brown, but I prefer mine in smaller single-serving size petite discs. One medium potato yields about two to three 3-inch hash browns. 3 hash browns are about how much fried food my body can handle before it goes on strike. Your mileage may vary.

Grapes added as a digestive aid. Rah-rah raw fruit!
Hash Purples
serves 4

1 lb purple potatoes
3 tablespoons pomace oil

1. Grate the potatoes using the large holes on your grater.

2. Heat one tablespoon of oil in a large frying pan on medium high heat.

3. While the pan is heating, squeeze out as much moisture as you can from the grated potatoes using a potato ricer. (If you don't have a ricer, use paper towels to squeeze out as much moisture as you can from the grated potatoes.) Wear dark clothing and do this over your sink. Purple potato juice is unforgiving.

4. Form the now-dry grated potatoes into small mounds. Press to flatten them out so they are about 3 inches long and a half-inch thick. Make sure they're about the same thickness all the way around for even cooking.

5. Working in batches, wait for the oil to start shimmering, but not smoking. Add the flattened potato discs, spreading them out along the bottom of the pan. Sprinkle some salt and pepper on the potatoes. After a few minutes, lift up one edge of the potatoes and see how done they are. If they have fried to a golden brown they are ready to flip. Continue to cook until they are golden brown on the bottom.

6. Repeat, adding oil as necessary to the pan, until all the discs are cooked through. Enjoy.
Many thanks to Elise for demystifying the ancient diner art of perfectly cooked hash browns! These are a colorful addition to any breakfast, and taste just as good as—if not "better" than—regular russet potatoes.

Monday, August 16, 2010

Homemade Flower Tortillas

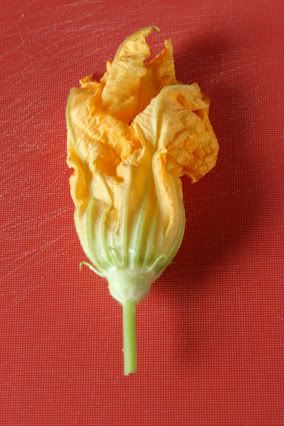
I love zucchini flowers. They're simply beautiful. And thankfully, easy to find if you go to the right farmers' market at the right time. (These are courtesy of the Friday morning Market near the Venice Library.)

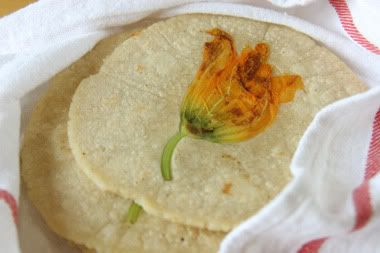
Typically you will find these pretty flowers stuffed with cheese and fried. Or cooked inside cheesy quesadillas. Very yum. But I wanted something slightly different. Last year I had a party at Rivera, a modern Latin cuisine restaurant in downtown LA. One of their signature dishes is the tortillas florales: tortillas with flowers pressed into them. And that's where the inspiration for these was born.

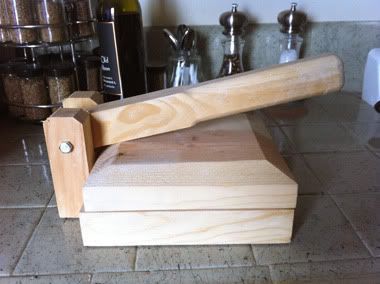
Corn tortillas are very easy to make, even if you're making them from scratch. I bought the pre-made masa at a local store, cutting out one step entirely. A tortilla press cuts down on the elbow grease too (though a rolling pin will do just fine). It's important to line the press with wax paper or plastic wrap to keep the tortillas from sticking. They'll peel off the quite easily this way.

A comal is handy for tortillas too, but you can use a skillet instead.

If you've ever pressed flowers in a book, you are already a tortilla making expert. That is exactly how these tortillas were made, right down to the pressed flowers!

A tip if you buy the blossoms but aren't going to use them immediately: put them in water, just like any other flowers. Store them in the fridge. They'll keep for a couple of days, instead of shriveling up within hours.


Flower Tortillas
Yields 10 tortillas, about 5-6 inches in diameter

1 lb prepared masa (tortilla dough)
10 zucchini flowers or other squash blossoms

1. Divide the dough into about 10 equal pieces and roll into balls.

2. Place a ball dough into the center of the tortilla press, and press down.

3. Open the press and place a flower in the center of the now flattened dough. Gently—the flowers are fragile—arrange so the leaves spread out slightly.

4. Press down again, but with only minimal force. You don't want to crush the flower, just embed it into the tortilla.

5. Cook the flattened dough in a hot skillet or comal over low heat for a few minutes on each side. The dough will become crispy and slightly golden. (You can also add a bit of cooking oil to the skillet and fry them instead. Your tastebuds will thank you but your arteries will not.) 

6. Put the tortillas in a plastic bag or wrapped in a tea towel to keep them pliable. Serve warm.
The tortillas will keep in the refrigerator for a few days. Put in a plastic ziplock bag and press out as much as the air as possible. To reheat, simply throw back on the skillet. Or, if you want to do it the way we always have in my house, throw on top of the burner over medium heat and flip with your bare fingers every few seconds until they are pliable again. Take care not to burn your fingers. G+F cannot be held responsible if you hurt yourself in the process.

The possibilities here are endless. You can press just about anything edible into a tortilla, or between two tortillas and create something closer to the Salvadorean pupusa. I personally like mine stuffed with cheese.

Now excuse me while I stuff my face with more flower tortillas. Mmm.

Thursday, August 12, 2010

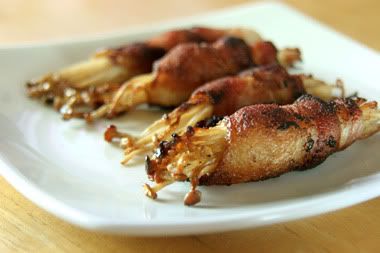
Pan-Fried Bacon-Wrapped Enoki

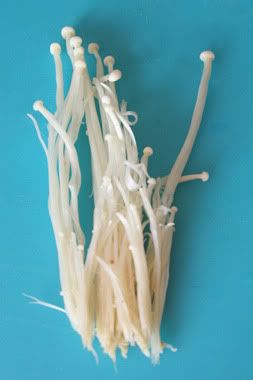
I had a hankering for spring rolls the other day so I visited my local Japanese market for supplies. And that is where I spied these very interesting little mushrooms. Enoki mushrooms are delicate, long white mushrooms with tiny little caps for heads, and are packaged in bundles. They're great raw. Throw them in a salad. They're an wonderful alternative to sprouts, which always taste like dirt to me (enoki do not taste like dirt).

And while the raw preparation is fine, fried isn't half bad. At all. I learned that when I put them in the spring rolls (which promptly exploded—apparently I didn't wrap them tightly enough). And then, of course, there's the no brainer: wrapped in bacon.

Do a search for bacon-wrapped enoki and you'll mostly find oven baked recipes. And while I'm sure that's fine and dandy, I had no desire to a) turn on the oven in the middle of the summer (despite the very cool temps we've been enjoying in LA), or b) wait the requisite 15-20 minutes for my food to be ready. So I pan-fried instead.

I rushed the cooking because, quite simply, I was hungry. And I had 30 minutes before a conference call, so the quicker the bacon fried up, the better. That's why everything looks a bit over-charred in this picture. But it still tasted like bacon heaven, so I cannot complain.


Pan-Fried Bacon-Wrapped Enoki
Yields 8 pieces

1 package enoki mushrooms
4 pieces of bacon, cut in half

1. Cut the dirty tail end of the mushrooms off. Separate into 8 smaller bundles.
2. Wrap a half-piece of bacon around each bundle. Secure with toothpicks.
3. Place in a skillet on medium heat. Cook until bacon is crispy all the way around.
4. Drain on paper towels until cool. Serve immediately.

Sunday, August 1, 2010

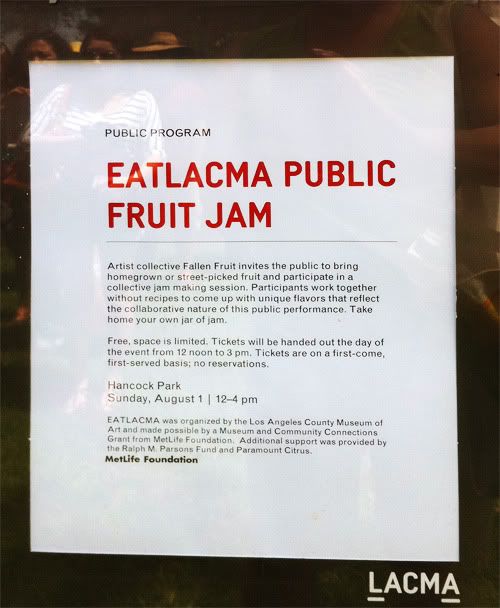
Collaborative Jamming with Fallen Fruit & Eat LACMA

I'm not what you call a "canner." I've never canned or preserved fruits for fear of catching botulism from improper sterilization. It just always seemed much too complicated. But when the dudes behind Fallen Fruit and Eat LACMA made it sound so easy, my mom and I decided to join in on the fun.

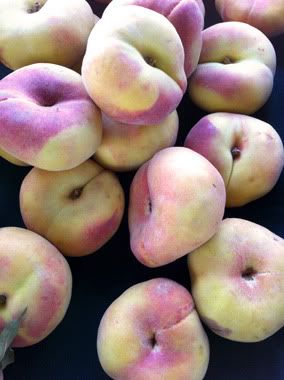
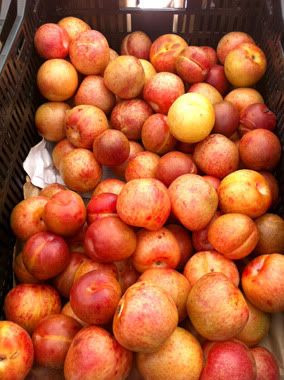
I had determined early on that I would make fig jam. My dad created the most delicious rack of lamb with fig sauce last week, and I'd been craving it ever since, so figs were high on my list. We headed out to the Eagle Rock & Roll Farmers Market (simply because we had never been to it) and found doughnut peaches, dinosaur egg pluots, blueberries (and even these very interesting artichoke flowers), but no figs. Nor were they at Henry's or Trader Joe's. I heaved a sigh of relief and decided to carry on.

Arriving at the museum, we made friends with strangers in line, and ended up sharing our offerings. There was also a communal table where, lo and behold, someone had donated figs! And poblano peppers! And herbs aplenty! All of these went into the chopped yummy goodness. After we filled a bowl, it was time to cook up some magic.

(As an aside, have you ever had figs and lavender together? Oh WOW...)

The Public Fruit Jam was a family-friendly affair, so I as I stood in line for a pot, I watched a little boy create his magical jam while standing on two huge sacks of sugar. I even videotaped him and his father spooning it into jars, which was super cute because the little boy was awestruck by what he had created (8 1/2 jars worth!). The whole afternoon had a super-friendly community-coming-together vibe, which I'm pretty sure is what the event designers had in mind.

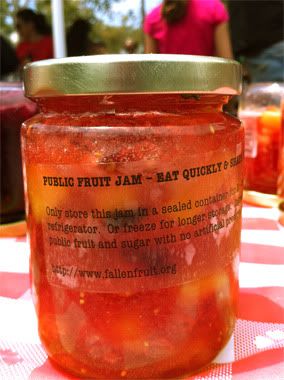
Finally it was my turn. We threw my chopped concoction in with some pectin and water, brought it to a boil, tossed in LOTS of sugar, tried to mash up the peaches (they were a bit hard and didn't break down very easily), added some basil, and voila! Jam!

We were encouraged to take up to 3 jars home. My jam recipe yielded 6 1/2 jars, and there were plenty others to choose from on the community table, but I opted for 3 of my own jam. I hope the other 3 1/2 jars were enjoyed by others.

The jars were provided by Fallen Fruit. Home cooks who choose to can at home should follow good sterilization techniques! The recipe that follows is exactly how we made the jam in the park, over hot plates and in communal pots. Your mileage may vary.

G+F Community-Produced Jam
Yields approximately 6-7 jars

2 doughnut peaches
2 figs
1 dinosaur egg pluot
1/2 poblano pepper
1/4 teaspoon each lemon and orange peel, chopped very fine
1 cup pectin
1 cup water
5 cups sugar
5-6 leaves of basil chiffonade

1. Chop all the fruits and vegetables into small pieces, approximately the same size. Note that the citrus peels should be chopped as finely as possible, as they don't break down very well when boiled.

2. Put all ingredients, except sugar and basil, in a large pot over high heat and bring to boil. Stir to incorporate all the pectin. Cook until fruits are desired softness. Harder fruits, like my peaches, may take a little longer to soften. Use a masher if necessary.

3. Add sugar and bring to boil for approximately another minute. Liquid should have a thickened considerably.

4. Turn off heat and add basil. Stir to distribute throughout.

5. Ladle jam into jars. The very patient and cheery volunteer cooks told us that holding the jars at an angle allows the air to escape as the food goes in, and also facilitates easier filling. Leave about 1/4 inch of head space, cap and immediately invert the jar. This allows for vacuum sealing without pressure cooking.

6. Allow jars to sit upside down for at least 5 minutes, though you're best off not touching them at all for at least an hour.

7. Refrigerate after opening. They should last about a week once opened, if they don't make it into your tummy before then.

The Public Fruit Jam was amazing. We spent a beautiful afternoon outside enjoying the sun and fresh air, learned a new skill, and met some very nice people. Thanks to the guys at Fallen Fruit for creating such a great event. We're looking forward to the finale Let them Eat LACMA in November!

Thursday, July 29, 2010

Fried Purple Baby Artichokes

Did you know that artichokes came in little purple packages? I didn't.

Every time I go to a farmers' market, I try to stick to a few items I know I'll use that week. But every time, I also find one item that I hadn't planned on. Sometimes they're the delicious strawberries I didn't think I needed (and then ended up on the Strawberry & Goat Cheese Pizza not too long after). Other times it's an item I have absolutely never used, but they look too beautiful to pass up.

That's the story with these artichokes.

I try to hit one of the West LA Farmers' Market on Sunday mornings, but I'm usually too lazy to get out of bed in time to nab the "good stuff." Last Sunday I broke with tradition and forced myself up and out to get to a market relatively early (only 2 hours after it opened!). And that's when I spied the purple chokes. Or chokies, since they're just wee little babies.

I walked past them, smiling. I wasn't really interested, even though I've been on a purple veggie kick lately (purple potatoes and purple eggplant...yesterday I even found purple bell peppers!). But a walk back through the same aisle proved too tempting. I gave in and brought them home.

Then I scoured the internet to find what to do with them. It turns out that Greg Henry has a wonderful recipe for fried chokies, and it appears about 17 thousand times on the front page of Google. So I took that as a sign that I should make them that way.

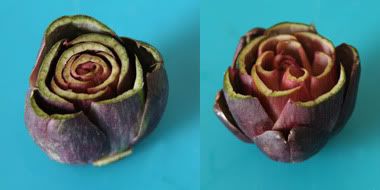
Greg recommends trimming the chokes and then pressing them down so the flowers open up and all the fried goodness gets down to the hearts. They'll look a little like this:

Trimmed, then pressed and opened, like a flower.

He also recommends using a combo of olive and peanut oil. Since I didn't have peanut, but pomace oil has an even higher smoke point, I used it. Plus, I had it on hand.

Using a deep fry thermometer is key. I winged it when I made it for my parents, and they didn't have the same crunch factor. For all I know, I was frying them at 300 degrees instead of 360 degrees the entire time. Don't do that to yourself. Get one of these.


From Sippity Sup:

Fried Purple Chokies
Serves 4

12 baby artichokes
enough olive (or pomace) oil and/or peanut oil to deep fry (depends on your fryer)
salt and pepper
lemon wedges (optional)

1. Trim away a few of the tough outer leaves of each artichoke, Then chop off about 1/3 of the top of the artichoke and trimmed the stem down so that the artichoke will sit flat. Use your fingers to pry and prod the leaves open some. Then invert the artichoke and gently flattened it a bit more using the palm of your hand. Gently is the key word here. They break easy. Drop each artichoke in acidulated water until ready to use.

2. The first fry is to blanch only so heat your oil to 300 degree F oil. Dry the artichokes off well before continuing. Drop a few at time into the oil for about 2 minutes. Remove them to a paper towel lined plate to drain (upside down). Work in batches so that you do not crowd the fryer.

3. When you are ready to serve the artichokes raise the temperature of the oil to 360 degrees F. They will sizzle and get brown and crunchy quickly; about 2 minutes total frying time should do it. Again, work in batches, and turn them over in the oil a few times while cooking.

4. Drain them well and give them a good sprinkle of excellent salt and a bit of pepper. A little spritz of lemon juice is good too. But you MUST eat them hot to fully enjoy their textures!
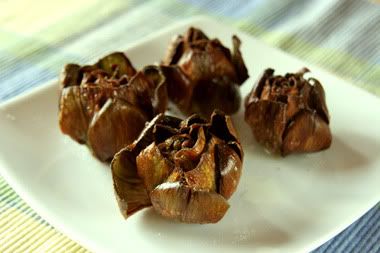
Mine appear a bit overdone in comparison to Greg's pictures. But they were still tender on the inside, and crispy like potato chips on the outside. I devoured these 4 in no time.

Saturday, July 24, 2010

Jalapeños en Escabeche

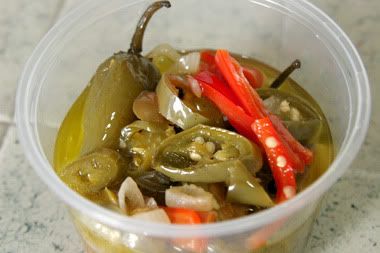
Simply put this is a pickled jalapeño dish. Depending on what part of the world you are in, escabeche can mean a variety of things, and spelled the same way it is pronounced a variety of ways. For our purposes, it's a vinegar and oil concoction of jalapeños.

My education on the subject started when I procured a small bag of the hot peppers. My mom suggested I make "un escabeche." Since I'm half-Mexican I should have known what that was. Instead (because I'm also half-not Mexican, or Mexican't) I Googled. And found a mess of recipes that called for sugar and vinegar and oil in varying quantities and a variety of added vegetables. My mom laughed at me and gave me her very simple breakdown:

Note: even though I put these in a plastic jar for a quick bit, they should be stored in glass or ceramic containers. The acid will leech the icky stuff out of the plastic and cause a third eye or something equally bad.

Rosita's Jalapeño Escabeche 
Yields about 1-4 pints, depending on additional vegetables

1/2 pound jalapeños
1/3 cup oil
1/2 cup vinegar (apple cider is a good choice)
1 cup water
4 cloves garlic, peeled and smashed (but kept whole)
1 shallot, thinly sliced
5-10 leaves of fresh oregano
5-10 black peppercorns (This was my father's contribution to the recipe. He is also not-Mexican.)
Optional ingredients: 1-2 carrots, handful of cauliflower florets, a small onion, etc (I only wanted to concentrate on the jalapeños, so I left all these out.)

1. Prepare the jalapeños any which way you want to preserve them. If you opt to keep them whole, cut a small X in the bottom of the pepper to allow the liquid to penetrate the insides. (As you can see from the picture, I kept some intact, sliced others).

2. Do a self-assessment. If you're heat-intolerant, you may want to discard the seeds. I did not follow my own advice here. The half-Mexican part of me took over the half-not Mexican and left ALL the seeds in.

3. Put all the ingredients in a sauce pan and bring to a boil. Open all the windows, and keep the hood fan running because boiled vinegar is pungent.

4. Once the boiling point is reached, simmer uncovered for an hour.

5. Enjoy the pungent smell of vinegar. Or go sit outside. This step is open to interpretation, but you do have an hour to kill. I chose to talk to my mom on the phone about how my Mexican side was showing itself. She was very proud.

6. Cool your concoction then store it in a glass or ceramic container. You can put in pickling jars and do a hot water bath. They'll supposedly last longer (about a month) in the fridge. Mine have been in the fridge for a week in a simple glass container and they're already half gone. So your mileage may vary.

The liquid from this recipe can also be used separately. I've used it on pizza dough to give it a golden brown crust with a spicy kick. Or as a simple spicy vinaigrette. The options are endless.

Wednesday, July 21, 2010

Caramelized Scallops on a Wonton Tostada

Today's dinner was courtesy of Food Gal's Thomas Keller "Ad Hoc at Home" preview, with some inspiration drawn from Brian Boitano's scallops with mango and avocado. Who knew Brian Boitano cooked, right?

I had no idea scallops could be caramelized. I'm always afraid of overcooking them. That happened to me once in a teppanyaki restaurant and it was so very disappointing. Rubber seafood is about as bad as it comes. Worse than rubber chicken.

Reading through Food Gal's comments I found that the original recipe of 10 total of water cups and the cup of salt could be halved, especially since I was only making a small test batch just for me. I pretty much followed the directions exactly, except for using table salt (at a ratio of 2/3 cup of table salt = 1 cup kosher salt) and only having the 4 scallops instead of a pound. I also cooked them in a cast iron skillet. They came out perfectly.

It's important to note that if you attempt this dish, you should definitely read Food Gal's post first. She does a great job explaining the entire recipe.

As for the mango/avocado/wonton piece of the puzzle, I upped the Mexican factor on this. Hence the "tostada" part of the title. Brian's recipe was a great start, but I didn't want to use coconut milk. It's super fatty and I wanted something a bit more savory. In keeping with the Mexican theme, I opted for Mexican crema, which is similar to sour cream, but more liquid-like. And instead of the recommended Sriracha, I subbed in adobo sauce. Adobo (not the brand name salt & pepper mix I also used) is the sauce that canned chipotles live in. Depending on your heat tolerance, a little goes a long way. (Both Adobo and canned chipotle are available in Hispanic markets.)

This was also my first time making clarified butter for the sear. It's readily available in southeast Asian stores, but it's so simple to make, and I only needed a small amount, that I tried my hand at it. For details on how to make it, see the Asia Recipe website.

Finally, I didn't see the point in cutting the wonton wrappers into circles, so I simply fried them as squares. Yes tostadas are circular, but that's just an unnecessary step.

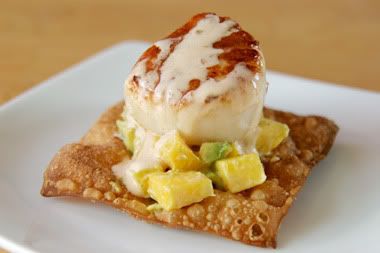
The sear on the scallops was unreal. And they were perfectly cooked, no rubber!

The combined recipe below was scaled down for a single serving.

Caramelized Scallops with Mango Avocado Relish over a Wonton Tostada

1/3 cup table, plus more to taste
2 cups hot water
4 cups cold water
4 jumbo scallops, tough side muscle removed from each one
About 2 tablespoons (1 ounce) clarified butter
1/2 lemon (optional)
2 cups canola oil
4 wonton wrappers
Adobo salt & pepper mix, as needed
1/4 mango, small diced
1/4 avocado, small diced
2 tablespoons crema (Mexican sour cream)
1/2 teaspoon adobo sauce (aka chipotle sauce)
1/2 lime, juiced

1. Line a small baking sheet with paper towels. Combine the 1/3 cup salt with hot water in a large bowl, stirring to dissolve the salt. Add the cold water.

2. Add scallops to the brine and let stand for 10 minutes.

3. Drain the scallops, rinse under cold water, and arrange in a single layer on the baking sheet. Cover with more paper towels and refrigerate for 1 1/2 to 3 hours (no longer, or the quality of the scallops will be affected).

4. While scallops are resting in the fridge, work on the relish and tostadas. In a medium pot, bring 2 cups canola oil to 350 degrees F. Fry the wontons in small batches until they are brown and crispy, about 2 minutes. Drain on a plate lined with a paper towel and season each with a bit of salt.

5. In a medium bowl, combine the diced mango and avocado. In another smaller bowl, whisk together the crema, hot sauce, and lime juice, and adjust the seasoning with the salt and black pepper mix, to taste. Pour half of the creamy mixture over the mango and avocado and gently toss to coat.

6. After the 1 1/2 to 3 hour rest period, heat a generous film of clarified butter in a large cast iron frying pan over medium-high heat until it ripples and begins to smoke. Sprinkle scallops lightly with salt and add them to the pan. Cook, without moving the scallops, until bottoms are a rich golden brown, 3 to 3 1/2 minutes. Turn scallops and caramelize the second side.

7. To assemble, put 1 tablespoon of the mango and avocado mixture onto a fried wonton. Top with a caramelized scallop and finish with a squeeze of lemon juice (optional) and a drizzle of the crema sauce.

This looked like a LOT of food on the plate. But when I was done, I wanted more. I don't know if it was just too little food, or it was so good it left me wanting more. I'm going with the latter.

Tuesday, July 20, 2010

Cork Bath Mat

One of the many things that goes oh so well with food is alcohol. You can cook with it, drink it while you cook, drink it after you cook, drink it when you're not cooking. Really, the possibilities are endless!

We, meaning me, here at G+F love our wine. Any wine really. Red, white, sweet, dry. I'm open to all.

Wine's slightly more socially acceptable than our, meaning my, other alcoholic vice, whiskey, which hearkens back to a time when such spirits were prohibited.

My family also loves the wine. We have a standing weekly wine & cheese night where we try out new varieties of both. There's a running list of yeas and nays somewhere. And a LOT of discarded corks. So finding Wine Harlots's Put a Cork In It series was a bit of kismet.

And now I really want to make this bath mat.


We are now saving corks.

Monday, July 19, 2010

Sweet & Sour Sauce—Now with Brown Sugar!

Since I've confessed my secret egg roll obsession, it's only fair that I also share the condiment behind the addiction: the sweet & sour sauce.

It started on a dark night...I came home from my secret and shameful drive-thru run to find that I had no sweet & sour sauce for my beloved egg rolls. Now, I like my little fried snacks, but I just can't eat them dry. So I headed into the kitchen to fix this faux pas and finagled a little white sugar magic.

I knew it could be done with brown sugar too, and let's face it: sugar in any color may not be so great for you, but this homemade dip is probably way less artery-cloggingly bad for you than the pre-packaged high fructose corn syrup variety that comes with the drive-thru egg rolls.

This is really damn good. I now eschew the fast food sauce for my own personal stash, of which there is ALWAYS a container of in the fridge. And if I happen to run out—the horror!—this whips up in a mere 5 minutes. Cheap, fast AND easy. Who said you couldn't have all three?

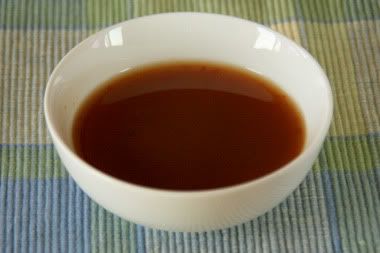
There would be egg rolls in this picture, but they didn't survive the photo shoot.


This comes from the About.com Chinese Food section. You can play with the ratio of sugar to vinegar to up the sweet vs sour taste. I actually prefer mine a bit tangier, so I sometimes add a bit more rice vinegar.
Sweet & Sour Sauce
Yields about 1/2 cup

1/3 cup white or rice vinegar (Note: rice vinegar gives better results)
4 tablespoons brown sugar
1 tablespoon ketchup
1 teaspoon soy sauce
2 teaspoons cornstarch mixed with 4 teaspoons water

Mix the vinegar, brown sugar, ketchup, and soy sauce together and bring to a boil in a small pot. Mix together the cornstarch and water, add to the other ingredients and stir to thicken.

(If desired, you can add 1 green pepper, cut into chunks, and pineapple chunks as desired after adding the cornstarch. For a thicker sauce, increase the cornstarch to 4 teaspoons while keeping the water constant.)

Thursday, July 15, 2010

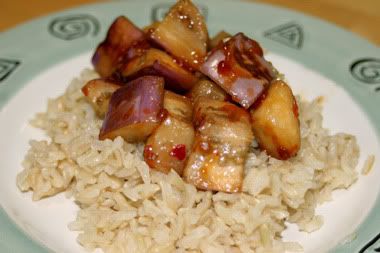
Hot & Sour Chinese Eggplant

Chinese eggplant is a fun vegetable. As I mentioned in a previous purple-hued post, they are less bitter than the American eggplant, have a lighter color and thinner skin, and also don't remind me of all those awful eggplant parmesan dishes I've had over the years. It's like there is no other way to cook an eggplant!

Thankfully Allrecipes has a fix for that. This hot and sour sauce for Chinese eggplant is delicious. I made it for my parents and served it alongside steak and brown rice. They loved it. The only changes I made to the original recipe were the omission of the chile (not on purpose, it was an oversight), using red chili paste instead of chili oil and the pomace for the vegetable oil, of course.

You also don't need to soak the vegetable for a full 30 minutes. 10 minutes and you'll be fine.

Mmm.


Hot & Sour Chinese Eggplant
2 long Chinese eggplants, cubed
1 1/2 tablespoons soy sauce
1 tablespoon red wine vinegar
1 tablespoon white sugar
1 green chile pepper, chopped (optional)
1 teaspoon cornstarch
1/2 teaspoon chili oil or paste, or to taste
2 teaspoons salt
2 tablespoons pomace oil

1. Place the eggplant cubes into a large bowl, and sprinkle with salt. Fill with enough water to cover, and let stand for 10 minutes. Rinse well, and drain on paper towels.

2. In a small bowl, stir together the soy sauce, red wine vinegar, sugar, chile pepper (if using), cornstarch and chili oil/paste. Set the sauce aside.

3. Heat the vegetable oil in a large skillet or wok over medium-high heat. Fry the eggplant until it is tender and begins to brown, 5 to 10 minutes. Pour in the sauce, and cook and stir until the sauce is thick and the eggplant is evenly coated. Serve immediately.

Yields approximately 4 servings.