Girl + Fire = Food
EMPTY SPACE

Pages

EMPTY SPACE

Wednesday, October 17, 2012

Girl + Conference: The Eats, Las Vegas Style

One of the best things about being an event planner is attending an event for which you are in NO WAY responsible. This is especially true when you've just come off an 11-month stint of planning and executing a 3-day event for 2000 people. Some might even call this a vacation, if such a thing existed for event planners. (They don't. You're always planning, whether it's your next 3 events or your next blog post.)

IMEX America is an amazing tradeshow in Las Vegas, which was, up until last week, one of my least favorite places. But spending time with some LV natives, off the Strip, taught me I might actually like Vegas.

And while I was able to do excellent networking and connect with industry friends, the parties are really what  this post is about. Because we ate (and drank) our way up and down Las Vegas Blvd (and off it) over the course of 5 days.

It was exactly what I needed. First up, the food. Next time, the drinks.

Note, when I remembered to shoot a picture of food (or drink), it wasn't with a real camera in perfectly lit conditions. It was with a crappy iPhone under mood lighting, because Las Vegas is very mood-oriented (read: dark).

We arrived at 3:45 pm on Sunday, which gave us just enough time to check-in to our hotel and hustle over to the Venetian | Palazzo, before being escorted to the Paris Hotel to be wined, dined and then whisked downstairs to see Jersey Boys. Bucking the standard, the Eiffel Tower Restaurant has delicious food. Also, floor to ceiling windows and beautiful sunset lighting (and a great view of the Bellagio Hotel seen above)!


Lox with cream cheese, fried cheese, and prosciutto with figs. Next time I'll show you what they offered to drink. Mmm.

This is what you eat at a classy evening reception. What you eat at 2 am after several hours of dancing, flirting with Australians, and drinking nothing but whisky at Gilley's over at Treasure Island isn't quite as beautiful. But damn if it ain't filling:
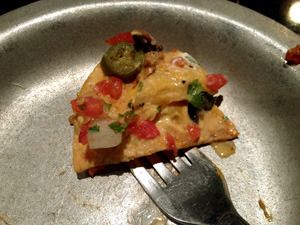

Nachos are good anytime. Especially at 2 am in Las Vegas.

Monday was a low-key day. We only had one reception before exploring the Vegas low-spots, like the ultimate dive bar Double Down Saloon that I had actually been to 10 years earlier. More on that next time.

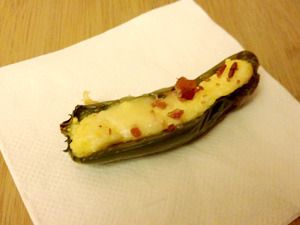
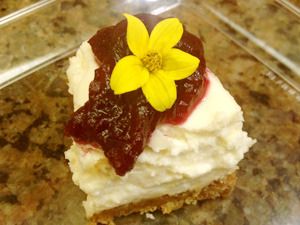
Canyon Ranch SpaClub at the Venetian | Palazzo has excellent massage therapists. Also, delightful food, like cheesy bacon-stuffed jalapeño and mini cheesecake. We ate far too many of these finger foods.

Tuesday was filled with vendor meetings all day followed by back-to-back receptions. They started on the tradeshow floor at 4 pm (sushi and sake at the Japan booth, tequila tasting at the Mexico booth, countless others) and continued off-site at various locations. We opted for tidbits at Shibuya, followed by drinks at the Hard Rock, capped off by dancing at eyecandy.
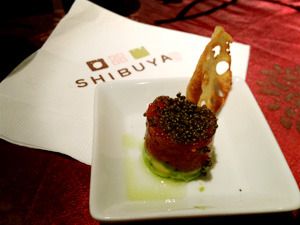
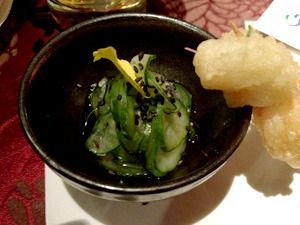

On top: tuna on a slice of avocado topped with caviar. Bottom: pickled cucumber (similar to ajad) and tempura rock shrimp. 

The Hard Rock had great little cake pops. I popped one into my beer (for picture-taking purposes only, of course). You aren't choosy at the open bar spots.

There was very little elegant eating after this. A quick tea latte in the morning, a bar sandwich after dancing till  2 am. You know, the usual.

There was delicious Korean BBQ at 3 am somewhere...but you know what you're not doing at 3 am while eating Korean BBQ? Remembering to take pictures under fluorescent lights, that's what.

Next time we'll focus on the liquid aspect of this event. Las Vegas is, after all, a desert. You have to keep hydrated.

On gin & tonics. Or whatever they're serving at the open bar.
Wednesday, October 10, 2012

Roasted Red Pepper & Chipotle Pesto

When I came across Aida Mollenkamp's recipe for a roasted red pepper pesto, I was intrigued. But as I read through it, I was disappointed by the ingredients.

Don't get me wrong, I love goat cheese. It's my favorite cheese. But the rest of the ingredients lacked oomph. I have a serious disdain for red pepper flakes.

They are fine on pizza, if you're into that. But for my sauce, I wanted a good spice kick blended throughout and not little flakes getting stuck in my teeth. At first I considered adding sriracha, but thought it might be a bit too extreme. I settled on chipotle peppers. And that's when this became a Mexican dish.

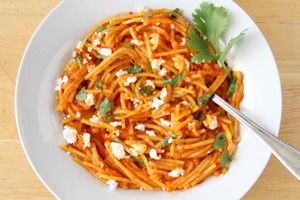
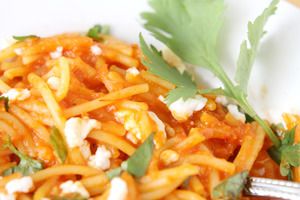
I figured chipotle and my beloved goat cheese, both being strong flavors, would compete for attention, but chipotle and queso fresco pair beautifully together. And it crumbles so nicely. Great on refried beans, delicious on chipotle & roasted pepper spaghetti. And since we were already going the Latino route, why not go all the way and use cilantro instead of thyme?

What came out was nothing like what Aida started with. It was so much better. Even without nuts.

The next morning, one of the taste testers mixed this dish with the citrus quinoa, wrapped it in flat bread and called it breakfast. He then tweeted a picture. Boys. They'll eat anything!


I think this sauce might be equally as good as a soup. That's an idea for next time.


print recipe

Roasted Red Pepper & Chipotle Pesto
Adapted from Roasted Pepper Pesto
Ingredients
  • 1 pound spaghetti
  • 2 tablespoons olive oil
  • 1/2 yellow onion, halved and thinly sliced
  • 3 garlic cloves, thinly sliced
  • 1/4 cup tomato paste
  • 8 roasted red peppers (1 16-ounce jar), chopped
  • 1 chipotle pepper in sauce
  • 2 tablespoons chipotle sauce
  • 2 teaspoons sugar
  • 1 teaspoon kosher salt
  • 6 ounces queso fresco (Mexican white cheese), crumbled
  • 2 tablespoons fresh cilantro, chopped
Instructions
1. Cook the pasta according to the directions. Reserve 1 1/2 cups of the past water then drain the pasta.2. While pasta is cooking, heat the olive oil until shimmering. Add the onion and cook until just as it begins to take on color, about 5 minutes over medium heat. Add the garlic for the last 30 seconds. 3. Add the tomato paste, both types of peppers (roasted and chipotle), chipotle sauce, and sugar (this balances the sourness from the tomato paste). Cook until thickened.4. Transfer the sauce to a blender and process until smooth. Return to the pan with the drained pasta and salt, and stir to combine. Add 1 cup of the pasta water and cook over medium heat until the sauce clings to the noodles. Add more water as needed to thin the sauce. 5. Serve topped with crumbled cheese and chopped cilantro.
Details
Prep time: Cook time: Total time: Yield: 6-8 servings

Tuesday, October 2, 2012

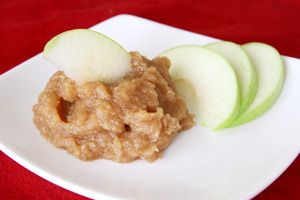
Lemon Whisky Apple Butter

Warning: this apple butter will make you drunk.

It's also full of stuff that's good for you, so as you're hitting the point where you're too dizzy to stand up straight, at least you're also getting some fruit in your system. And you know what they say about apples and doctors and such.

I really like apples, which is partially while I'll never die (at least not from seeing a doctor). I also really like applesauce because it reminds me of my childhood. And apple pie. Mmm. I experimented with this twice, both times with a cup full of Highland Park 12. Not bacon scotch, mind you, but a just a good single malt. The house smelled divine.

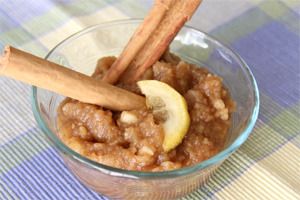
Making applesauce is pretty easy: chop up a bunch of peeled apples (or unpeeled, if you have a food mill—I don't) and let them simmer in a bit of water with cinnamon until the apples break down into mush. It'll take about an hour. You can liven it up by dropping in some orange zest stabbed with cloves. Also yummy. Or, you can add a cup of scotch and some lemon zest and enjoy the aroma as your apples get drunk. (Pour yourself a shot too.)

That last one is my favorite.

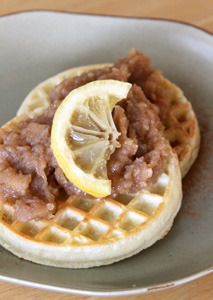
The first time I made this, I didn't mash the apples up much so the texture was a bit more chunky. As taste tester Whisky Guy Rob ate it, he fantasized about putting it on waffles or ice cream. So I had that for breakfast. It's a hot toddy on a plate!

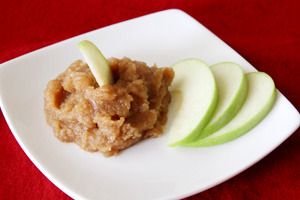
The second time, I opted to use the food processor and get the consistency down to a smooth apple butter. Then I served it to a bunch of food bloggers. The reviews were hilarious.

  • Kim Burnell of Rustic Garden Bistro: Delicious. Amen.
  • Dorothy Reinhold of Shockingly Delicious: That was some dang fine whiskey apple butter. I needed a designated driver to get home!
  • Neha Mathur of From My Heart: Mmm...That was so good...I still have a hangover.

Don't say you weren't warned!


Next time I'm baking this into a pie. Drunken apple pie!!


print recipe

Whisky Apple Butter
A decidedly adult twist on the standard comfort food.
Ingredients
  • 1 tablespoon unsalted butter
  • 2 tablespoons fresh ginger, chopped (about a 2-inch piece)
  • 2 large Granny Smith apples, peeled and chopped
  • 3 medium Gala apples, peeled and chopped
  • 1 cup dark brown sugar
  • 1 tablespoon ground cinnamon
  • 1 tablespoon lemon zest (tied in a muslin pouch)
  • 1/2 teaspoon salt
  • 1 cup quality single malt scotch whisky, such as Highland Park 12
Instructions
1. Brown the butter in a large saucepan. Once you can smell the slightly nutty aroma, add the ginger and sauté for one minute. 2. Add remaining ingredients: apples, brown sugar, cinnamon, salt, lemon zest in its pouch, and bourbon. Simmer uncovered until apples are very tender and liquid is almost all gone, about 60 minutes.3. Remove lemon zest pouch and mash the apples for a chunky consistency. Or, puree in a food processor until desired consistency is achieved.
Details
Prep time: Cook time: Total time: Yield: 6-8 servings

Wednesday, September 26, 2012

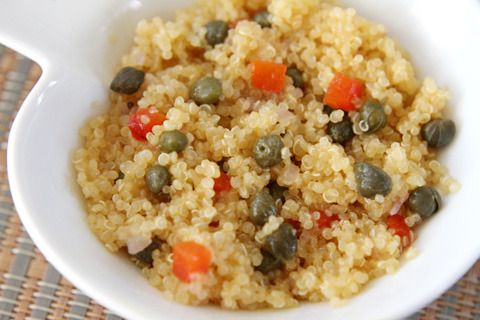
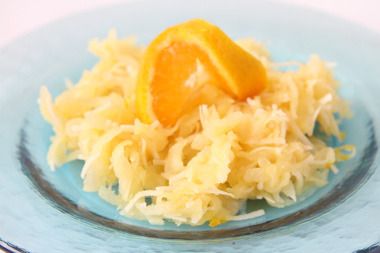
Citrus Quinoa

I've been feeling stuck in the creative doldrums lately. I haven't been taking pictures, haven't been cooking, and certainly haven't been blogging. I have been working like a mad woman on that event planning thing that pays the bills, so that's partially to blame. To combat this, I forced myself back into the kitchen this past weekend, behind the stove and lens, and ran tests on three separate dishes.

It was good to be back. I even removed the safety net of food experimentation and invited friends over to taste what could have been three separate disasters. Turns out I might actually know how to cook, so not only did I not burn my house down, I scored a home run on all three.

Or, maybe three touchdowns? I had football on the entire time. I have three fantasy teams to keep track of, after all! There's a theme here...

The most popular dish was a riff on a Food 52 recipe. Instead of couscous and olives I opted for quinoa and capers because why the hell not? I really had no other reason.

There's something elegant in simplicity. A handful of simple ingredients + 20 minutes = a big explosion of deliciousness in one's mouth. Those little green capers will do that to you. They're like teeny bombs of sour awesomeness.

I'd actually made the original recipe a few months back. It's good. This was better. Capers kicked it up a few notches.

And it's not the first time I've played with cooking quinoa in unconventional ways. Quinoa for breakfast, anyone? Cooking it in orange juice didn't seem like too far a stretch.

I was also testing a recipe full of roasted red peppers, so I cut one up and threw it in this dish for a nice dash of color. But you could just as easily use pimento for a sweeter kick. That's what would probably be stuffed in your olives anyway. Life is full of choices.

Thank you to my wonderful buddies Elise, DeShawn, and Rob for their input. To quote one of them, "the capers and orange juice did a dance on my tongue as they co-mingled together." How great is that? You can make your tongue DANCE with this!

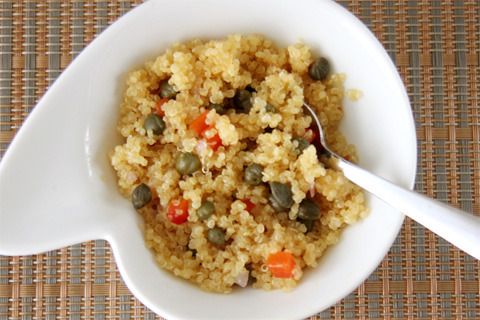
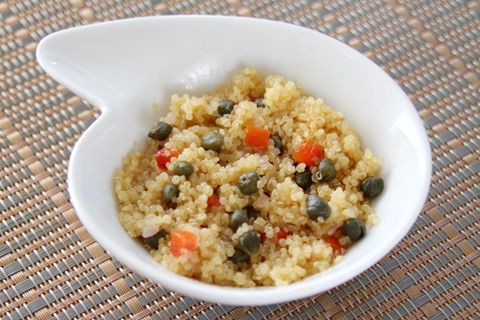
And thanks also to my mom for this cute little dish. I love it.


print recipe

Citrus Quinoa
A flavor combination that will make your tongue dance.
Ingredients
  • 1 cup quinoa
  • 1 3/4 cup orange juice (no pulp)
  • 1 medium shallot, minced
  • 1 tablespoon olive oil
  • 1 tablespoon capers
  • 1 tablespoon roasted red pepper, minced
Instructions
1. Rinse the quinoa until the water runs clear (this removes the bitterness), then place in a pot with the orange juice. Cover, bring to a boil, then simmer for 20 minutes, until fully cooked.2. While the quinoa is cooking, sauté the minced shallot in olive oil until translucent. 3. Once the quinoa is finished cooking, fluff with a fork and fold in the shallot, capers, and pepper. Serve warm.
Details
Prep time: Cook time: Total time: Yield: 2 cups

Tuesday, September 18, 2012

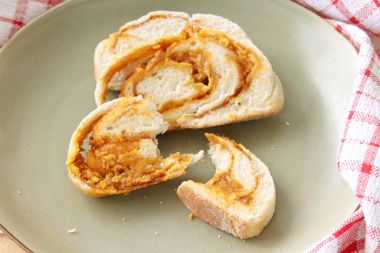
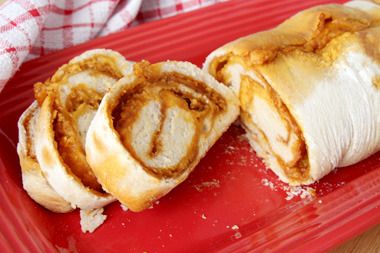
Cheater’s Sriracha Cheese Bread


My dear foodie friend Oakley, who I mention  often, hosted a dinner party. After we had our fill of tandoori chicken and a half-naked Ryan Reynolds on tv, there was gifting!

I came away with a cookbook dedicated to all things sriracha, aka rooster sauce. I put this on everything, when I’m not using (or—gasp!—out of) salsa verde. So it was only natural that I’d want to make little vittles with it too. Well, it turns out the book is a bit simple (add sriracha to whipped cream cheese and voila! A new dip…?), but the one recipe that intrigued me was a loaf of sriracha cheese bread. 

I’ve stopped saying that I don’t bake, but I’m still not in love with getting flour all over my kitchen. When you have tile countertops, cleaning flour particles out of the grout is a huge pain in the ass. But you could cut 15 steps out of the recipe by simply using pre-made pizza dough and I’m all for shortcuts! Trader Joe’s sells pizza dough for all of $1.50. With that, a quarter cup of rooster sauce, and a cup of cheese, you’re done!

Homemade bread!


Of course, flour still gets all over the kitchen because you have to roll said pizza dough out to a 9-inch rectangle, so it’s still a pain in the ass. But it wouldn’t be baking if we missed this crucial step.

Spread about a quarter cup of the sauce out, leaving a 1-inch border. Cover with shredded cheese (I used cheddar—but you can substitute your fancy sriracha cream cheese dip…?), roll it up jelly roll style, and bake for 20 minutes in a bread pan at 400 degrees. You will want to slice the top to give the bread room to puff up. And give it a good egg or olive oil wash, to crust the top. You’ll have a spicy bread within the hour (once you let it cool, lest burning your tongue is on your agenda).

I didn’t do the wash part and my loaf looked a bit albino in the end. Note for next time.


For the original recipe, check out The Sriracha Cookbook.

Look at me. I bake. Huh.

Wednesday, September 12, 2012

Dulce de Jicama


The same day I tested the Mexican chocolate cookies, I tested a recipe courtesy of The Sweet Life.  Vianney has spent more time in Mexico than I have, and I was excited to taste this dish I’d never even heard of.

The only way I’ve ever eaten jicama is raw, cut into sticks and sprinkled with chile for pico de gallo. I really like it this way, so I was intrigued by the sweet turn.

Jicamas are ugly on the outside. They look like dirty roots. But you know what your mother said about judging books by their covers. They’re similar to potatoes in firmness, but blander in taste. They actually don’t have much flavor at all, which is why you often see them with the chile! Or with lime juice (or both).

Apparently my sweet tooth is of a Mexican variety, given I made this and the chocolate cookies at the same time. But I really liked this recipe. It's simple, as cooking should be. And I love Vianney's stories. Of course, I had to make modifications, because when do I ever take the easy route? I couldn't find unsweetened coconut, so that's where it started.

The orange juice took far longer to boil off than Vianney’s recipe stated. Maybe she boiled at a higher level of heat. I was being overly cautious, not wanting to burn this. And since I was using sweetened coconut, I simply left out the sugar…though it still came out tremendously sweet. This is something you eat in small quantities, like a tiny bit on ice cream.

The G+F taste testers were all on board. Luckily none of them hate coconut, like some people who confound me. I love coconut! Especially the fresh coconuts we’d have in Mexico when I visited as a child. The street vendors had huge green ones they chopped open with machetes and then stuck a straw in for your slurping delight. Such good memories of visiting family.


Maybe next time, we’ll all indulge in this dulce!

Original recipe over at The Sweet Life.

Wednesday, September 5, 2012

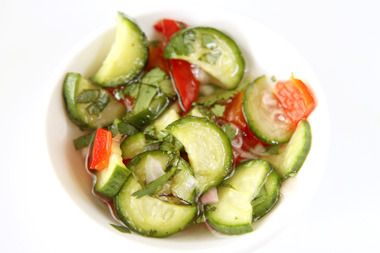
Ajad – Thai Cucumber Salad


For the last 25+ years, my family has been frequenting the same Thai restaurant in Burbank. To pass it on to the next generation, my brother’s family orders take-out from it regularly. I have always ordered the chicken satay. I love slathering the chicken skewers with peanut sauce and then sprinkling on the sweet vinegar from the cucumber salad before popping it in my mouth. To this day, it reminds me of being seven years old.

But what is that sweet and sour relish filled with cucumbers and onions? Oh, it’s known by many names, but the proper name is ajad. Or ajat, ached, or อาจาด. My Thai friend Oakley, she of the Oakmonster food blog—and the catalyst for the bacon scotch we always keep on hand in the G+F kitchen—told me ajad is correct. And because she will play tour guide on my eventual trip to Thailand, I believe her. She’s also originally from Bangkok, so she should know.

And who knew it was the easiest dish to make? Certainly not seven year old me, who believed this sweet and sour concoction must be magical. I was always afraid to finish it for fear that there would be none the next time. The innocence of childhood!

But it truly is so simple. Cut up a cucumber, some shallots, a pepper (I prefer red Fresnos for color, as do the folks at Saveur), boil some water, mix it with vinegar and sugar, toss in some cilantro, and you’re done. Waiting for it to cool enough to eat is the hardest part.

This keeps well in the fridge for quite some time, given the preservative qualities of the vinegar (and sugar). I now consistently keep it on hand. Because it IS magical. And I never want it to disappear!


Saveur’s recipe calls for a LOT of shallots. I rarely use more than one small one for a large cucumber. Your mileage may vary.

Original recipe on Saveur's site.

Tuesday, August 21, 2012

Spicy Mexican Chocolate Cookies

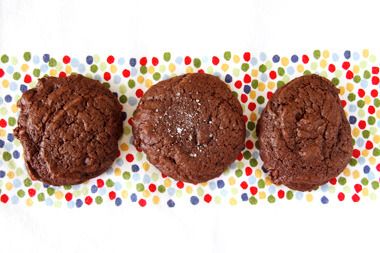
Before it got super ridiculously hot, I was doing crazy things, like baking. I don’t know what’s gotten into me, since cleaning up after baking can be soooooooo time consuming. But when I found this recipe for Mexican spiced chocolate cookies, I was intrigued. Plus, it was another opportunity to use my shiny red mixer.
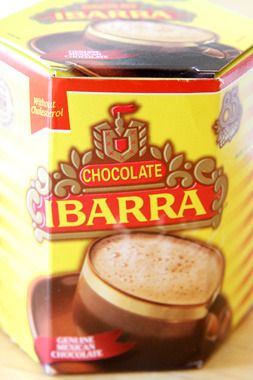
When I read through the recipe, I was dismayed that it didn’t actually call for Mexican chocolate. Come on, brown people aren’t the only ones that use cayenne and chili powder! No, what this really needed was authentic Mexican chocolate, the kind my mom used to make us hot chocolate with when I was little. Chocolate Ibarra, to be exact. The octagonally-shaped cylindrical package was a staple in our house like Nestle Quik probably was for my school mates (though we indulged in Nestle Quik too). There’s a comfort in my memories of that steaming cup of chocolate.

But because this is not unsweetend chocolate, I had to cut back on the sugar too (by half—though I probably could have done without it completely). I also had to double the spices because a quarter teaspoon of cayenne is child’s play. Even with that modification, they spice factor still wasn’t up to my expectations. More spices!! You can't call something "spicy" if it isn't, indeed, spicy!

This also didn’t need the additional chocolate chips, but walnuts would’ve been nice. Or spiced cacahuetes (peanuts). It was a bit of chocolate overload. Not that that is a bad thing...

The recipe calls for an entire stick of butter, so the cookies are exceptionally chewy. If you’re calorie-conscious, this isn’t the recipe for you. I suppose you could cut back, but not being a baker I’m not sure exactly how that would impact the final product. Other than giving you a slightly more brittle cookie. Diet cookies? Ick.


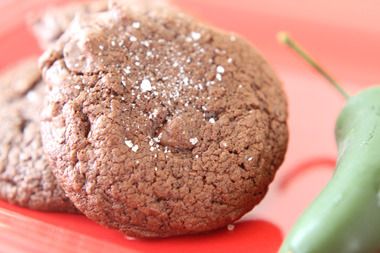
Finally, the cookies should be finished with a bit of sea salt. The G+F taste testers agreed the salted cookies were superior to the non-salted version. Plus, they just look prettier!


print recipe

Spicy Mexican Chocolate Cookies
Adapted from Cooking Channel's Spicy Mexican Chocolate Cookies, with real Mexican chocolate. 
Ingredients
  • 1 stick (4 ounces) unsalted butter
  • 4 ounces Chocolate Ibarra or other Mexican chocolate (available in the ethnic aisle or a Latino supermarket)
  • 1/4 cup packed brown sugar
  • 1/4 cup granulated sugar
  • 2 teaspoons vanilla extract
  • 2 large eggs
  • 1 cup all purpose flour
  • 1 tablespoon ground cinnamon
  • 1 tablespoon chili powder
  • 1 teaspoon cayenne pepper
  • 1/2 teaspoon baking soda
  • 1/2 teaspoon kosher salt
  • medium coarse grain sea salt for sprinkling
Instructions
1. Preheat the oven to 325 degrees F.2. In a heatproof bowl set over simmering water, melt the butter and chocolate together, whisking until glossy and smooth. Alternatively, the butter and chocolate can be melted in the microwave (in a microwave-safe bowl) in 25-second increments, whisking between each interval. Cool the chocolate mixture to room temperature.3. In the bowl of a stand mixer fitted with the paddle attachment (or a hand-held mixer), beat the brown sugar, granulated sugar, vanilla extract and eggs on low speed until well combined. Pour in the cooled chocolate and continue to mix until the ingredients are evenly distributed.4. In another bowl sift together the remaining dry ingredients (flour, cinnamon, chili powder, baking soda, salt and cayenne pepper). Add this to the chocolate batter and mix on low speed until just combined and no visible flour remains.5. Working in two batches, scoop 12 balls of dough (about 1 1/2 tablespoon size) onto a parchment-lined sheet pan, leaving at least 1 1/2 inches of space between each cookie (they will spread greatly). Bake the cookies, one pan at a time, for approximately 14 minutes, rotating the pan halfway through cooking time. The cookies should be puffy and still fairly soft when removed from the oven.6. Immediately slide the the parchment paper onto a wire cooling rack. Cool just a bit before serving, 5 to 10 minutes, then finish with a sprinkling of sea salt. Cookies can be stored in airtight container for up to three days.
Details
Prep time: 20 minutesCook time: 15 minutesTotal time: 35 minutesYield: 2 dozen (24 cookies)

Wednesday, August 15, 2012

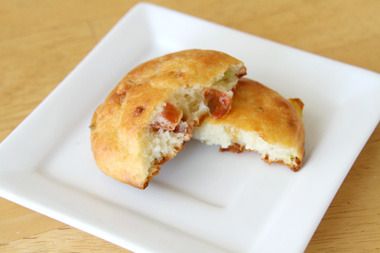
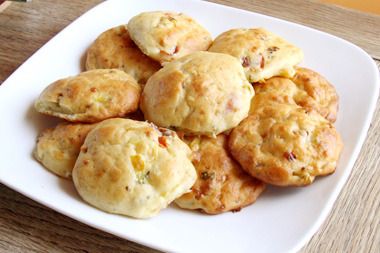
Feta & Tomato Biscuits

I'd taken a nice summer hiatus from blogging, but heading to the August Food Bloggers LA meeting kicked the habit back. I even went so far as to bake (!!!) a recipe I'd never tested. I threw all caution to the wind.

Go big or go home, right?

The theme for the August meeting (always a potluck gathering) was to use either tomatoes or zucchini, or both, since they are abundantly available. At first I was tempted to make a tomato jam. But then muffins became a more attractive option. And from muffins I went to biscuits.

Notice how zucchini was never a part of the discussion?

It's hot as hell everywhere in this country, even out here on the west coast, and yet I risked burning to a crisp to turn on the oven. Thankfully these only take 20 minutes. And I did it at 7 am when it's still under the Hades heat level.

And they were good. Half of them disappeared at the meeting and thankfully Dorothy from Shockingly Delicious took the rest home. No overly carby leftovers for me to munch on!

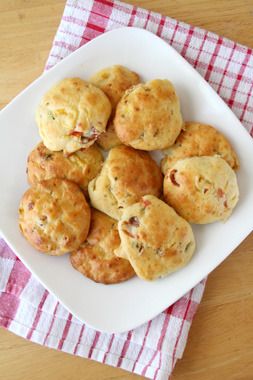
The original recipe is actually for muffins, but it's so easy to drop batter on parchment-lined baking sheets instead. Using Greek yogurt instead of the typical milk makes for a light, tangy biscuit. And these spread. You'll end up with little disks instead of actual biscuits, but hey, they still taste good.

One little mistake I made was thinking my dried mint was basil. Oops! So a little bit of mint ended up in the finished product. And cilantro, along with the basil. Great combo. But it was only a teeny pinch of mint. Though if I make these again, I probably would repeat this happy accident.

I'm going to try not to bake again until the heat index goes back to less hellish levels. But I might finally be getting the hang of it.


It's about time.


print recipe

Feta & Tomato Biscuits
Adapted from Savoury Tomato Muffins, the biscuits are a light breakfast snack 
Ingredients
  • 2 cups flour
  • 2 eggs
  • 1/2 cup Greek yogurt
  • 1/4 cup olive oil
  • 2 cloves garlic, minced
  • 1 cup cherry tomatoes, deseeded, finely chopped, and drained
  • 1/2 cup feta
  • 1 tablespoon dried basil
  • 2 1/2 teaspoon baking powder
  • 1/2 teaspoon salt
  • pinch dried herbs, like mint!
Instructions
1. Preheat oven to 400 degrees.2. Lightly fry the minced garlic (30 seconds), then drain. Mix with the chopped tomatoes and herbs.3. In a bowl, beat the eggs, salt, oil, and Greek yogurt together.3. In a separate bowl combine the flour, baking powder, and cheese together, then add the egg mixture. Fold in the tomato mixture.4. Drop spoonfuls of the mixture on top of a parchment-lined baking sheet. Bake for 20 minutes. Allow to cool on a wire rack for about 5 minutes before eating.
Details
Prep time: Cook time: Total time: Yield: about 15 biscuits


Saturday, August 11, 2012

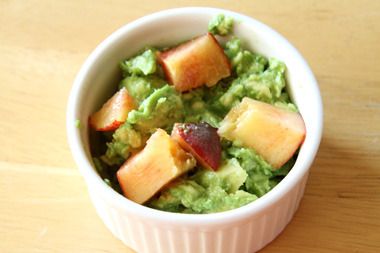
Guacamole with Nectarines


My father, not a Mexican and therefore not entitled to tell me—who IS half a Mexican!—how to make my guacamole—the food of MY people—hates that I don’t add jalapeño to my guac. You know what? I’m an adult now, I can have my guac any darn way I want.

Of course, even though he’s only Mexican by association to my mother, to whom he has been married to for 36 years this month, he does make the most kick ass salsa verde. We’ve established this. But I don’t like the guacamole that comes out of MY kitchen to be spicy. I like it to have a hint of sweetness instead.

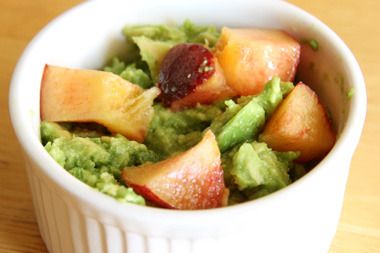
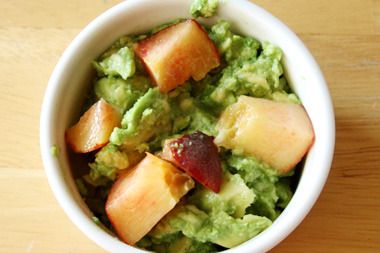
Avocados are absolutely perfect on their own. They’re filled with good fat. They’re a gift through the centuries from the Aztec people (I might be embellishing). They’re green. The skin on some of them looks like it was birthed by a dinosaur. You can sub them for bananas in baking. And they’re delicious! But if you add a teeny bit of garlic salt and a cubed nectarine, you have a dip that will blow your mind.


I am not overstating that fact. Take a bowl of the green stuff topped with stone fruit to a party, and people will look at it askew. Then, after you dare them to taste it, they suddenly turn rabid. Every single time I take this to a party it disappears immediately. Every single time I make myself a single serving of it, I seem to inhale it. Something about avocado + nectarine = food orgasm.

The original recipe I found nearly 10 years back, before the popularity explosion of all things culinary. Nowadays, the pairing of these two items doesn’t seem that unusual, but back then, people were weirded out. And this is California, for crying out loud! Weird food is where we’re at. Anyway, the original recipe called for peaches. But when I did the grocery shopping for this particular dish, the peaches were ridiculously expensive. Their non-furry pals, on the other hand, weren’t going to cost me un ojo de la cara (Spanish for “my first born” or some such saying). And thus my new go-to party dip was born.

The ratio of 2-3 medium avocados to one nectarines scales easily. Nectarines seem to bear more flesh than avocados, which is why you want more of the green fruit than the peachy. Add a sprinkle of garlic salt to taste, squeeze a lime over, and you’re done. 

And don’t kid yourself that saving the pit will keep your guac from turning brown. What you need to do is cover with plastic film, but push it down onto the dip so that no air enters the bowl before you’re ready to dig in. 

If you, like my dad, just can’t abide by guacamole sin jalapeño, then by all means, add it in! Who am I to tell you how to make your food. They’re your tastebuds. 

Plus, I’m only half-Mexican, after all.


print recipe

Guacamole with Nectarines
A sweet twist on your favorite summer party dip. For a spicier take, add a jalapeño or chile flakes.
Ingredients
  • 6 medium avocados
  • 1-2 medium nectarine
  • garlic salt, to taste
Instructions
1. Slice the avocados in half. Discard pits and remove meat into bowl. Mash to a chunky consistency.2. Cube nectarine and add to mashed avocadoes. Stir to combine thoroughly. Add salt to taste. 
Details
Prep time: Cook time: Total time: Yields: 1 medium bowl

Tuesday, June 26, 2012

One Last Hurrah for Foie Gras

We've been on a bit of a hiatus lately. Indulging in the pure enjoyment of food and not the constant recording of it. But later this week, the California ban on tasty duck liver goes into effect. No more foie gras for Californians! We had to get our last taste in before it goes away for good, and found some at Umamicatessen.

It's a controversial debate, this banning of food. But will it spawn a black market for the delicious pâté, replete with an underground network of distributors? Will the privileged few hold hush-hush dinner parties behind bolted doors that you can only access blindfolded and with a password? Are we in for another Prohibition era? Bathtub gin and duck liver, mmm!

What is it about this buttery pâté that is so delicious? Cow liver tastes like mushy black death, and I know this because my mother made me eat it once as a child, and it was the most revolting thing ever. Nothing I've eaten since has ever been that bad. The memory still haunts me to this day. Some people like it; I'm not one of them. Eww.

Duck fat is highly prized, called liquid gold in some circles. Peking duck, which I had for the first time in San Francisco's Chinatown (a resplendent city center of chaos and divine odors wafting through the air as I walked through it, wide-eyed and entranced) defined what Chinese food should be for me at as a young teenager. So it's no wonder that duck innards, in this case the delectable liver, are equally as popular.

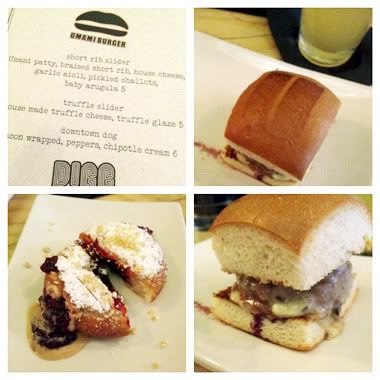
Popular, but not inexpensive. When Grub Street, reporting on the looming ban, listed several places at which one could steal a final mesmerizing duck-filled feast, we opted for the most economical: Umamicatessan's foie gras doughnut. That such a high-end food product could be found in a piece of fried dough was perfectly incongruous. It was also an excuse to check out the Umami chain's downtown locale.

What we found was a full service restaurant and bar, which we walked into right at the start of happy hour. An auspicious beginning! The bar menu boasted many offerings but all I saw was a truffle slider. It was no contest: a truffle slider with a Belgian-style wheat ale and foie gras donut for dessert! The perfect last meal.


The burger was exceptionally juicy, my mouth is watering at the mere memory. With a trademark U seared into the bun. Cute.

Then came dessert. A jelly donut, the insides sharing space with a creamy foie gras mousse. A teesy weensy amount of foie gras mousse. About $8 worth of mousse. I ordered 3.

I know you're asking yourself how I could spend $24 on a mere three doughnuts. Am I insane? Can I write it off? If you've been reading this blog for any length of time I don't need to answer that because the answer is, clearly, when it comes to food, a resounding duh. (And no, I can't write it off.)

I had to devour one and save the other two for your photographic pleasure, obviously. And also my breakfast pleasure.


So how does one feel after savoring $24 worth of FG&J doughnuts? Not well. That's a lot of fried food. And NOT a lot of duck liver. Would I have preferred the foie gras sushi at the prohibitively expensive neighborhood restaurant n/naka? Absolutely, but the rent is due.

Though you might find me at Tasting Kitchen at some point in the next few days, like an addict, looking for one last score.

Thursday, May 17, 2012

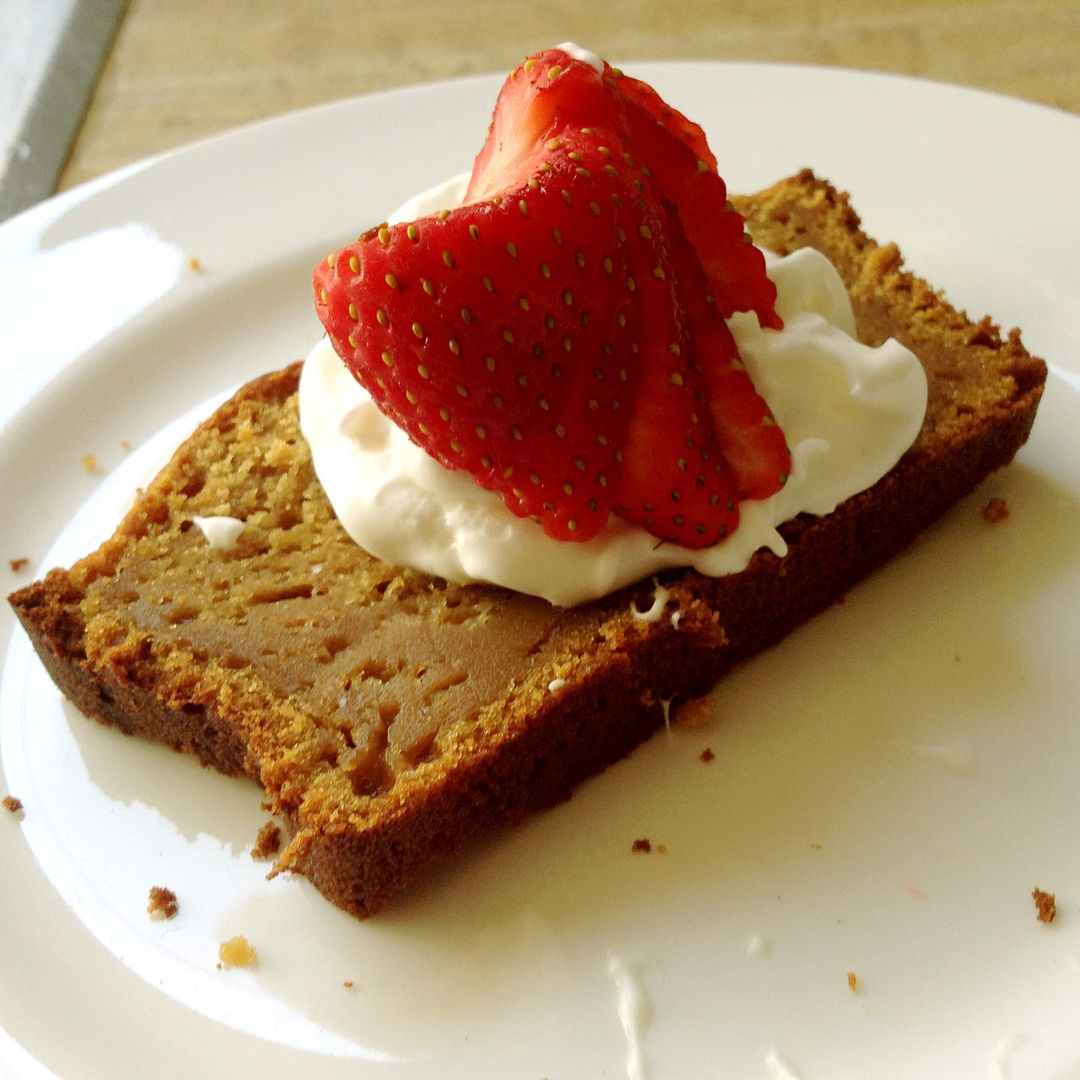
Pomegranate Molasses Yogurt Bread

I don't know why I shy away from baking. I even bought myself what has been termed the gleaming red Ferrari of a mixer to try to overcome this. I really should be more enthused about it, it's like chemistry! I liked chemistry.

So when the ladies at Food 52 posted a recipe for Maple Yogurt Pound Cake, I decided to experiment. I switched out the maple syrup for pomegranate molasses, and use tart Greek yogurt.  Super tartness!

The first time the bread came out tasting pretty good, but it didn't rise much. I realized my baking powder was probably too old. I liked the sweet tartness of the pomegranate molasses, and it was so very moist. So I made it again for Mother's Day.

The second time around I also tripled the sugar, using brown sugar too. Since the original recipe used maple syrup, I had to make up for the lack of sweetness. And I love brown sugar. 

The reviews were definitely mixed. I loved it, super moist and tart, but it a good way. My mom loved it, but my niece, nephew, and older brother did not. I told them their palettes weren't sophisticated enough to appreciate it, but they would get there eventually. These are the same people who love my pancakes, after all.

The original recipe is here.


print recipe

Pomegranate Molasses Yogurt Bread
A tart but exceptionally moist loaf of cake bread.
Ingredients
  • 1/2 cup pomegranate molasses
  • 3/4 cup Greek yogurt
  • 1/2 cup brown sugar
  • 1/4 cup white sugar
  • 3 eggs
  • 1 teaspoon vanilla
  • 1/2 teaspoon lemon zest
  • 1 1/2 cups flour
  • 2 teaspoons baking powder
  • 1/4 teaspoon salt
  • 1/4 cup oil
Instructions
1. Preheat oven to 350 degrees F. Spray or butter a metal loaf pan (8.5 x 4.5 x 2.5 inches).2. Whisk together the molasses, yogurt, eggs, sugars, vanilla, and lemon zest. In another bowl, combine the flour, baking soda, and salt, then add to the wet ingredients. Once the dry ingredients are fully incorporated, add in the oil until fully absorbed by the batter.3. Pour batter into the prepared loaf pan and bake for about 50 minutes. If a toothpick tester doesn't come out clean, cook for another 5-10 minutes.4. Allow cake to cool in the pan for 5 minutes, then cut around the sides to loosen. Turn the cake onto a rack and cool completely.5. Top with butter, whipped cream, or simply stuff it naked in your mouth.
Details
Prep time: Cook time: Total time: Yield: 1 loaf